If you want to make parking and reversing your car safer and easier, connecting a rear camera to your car stereo is the way to go. Imagine having a clear view behind your vehicle every time you back up—no more guesswork or worrying about blind spots.
In this guide, you’ll learn exactly how to connect your rear camera to your car stereo step by step, even if you’re not a tech expert. Keep reading, and you’ll soon enjoy the confidence and convenience that comes with a perfectly installed rear camera.

Tools And Materials Needed
Connecting a rear camera to your car stereo needs some basic tools and materials. Having the right items makes the job easier and safer. Prepare everything before starting the installation. This saves time and avoids mistakes.
Essential Tools
- Screwdriver set for removing panels and screws
- Wire stripper to remove insulation from wires
- Electrical tape for securing wire connections
- Multimeter to test electrical connections
- Drill with bits for mounting the camera
- Trim removal tool to avoid damaging car interior
- Socket wrench set for bolts and nuts
Required Materials
- Rear camera compatible with your car stereo
- Wiring harness or extension cables
- Fuse tap or inline fuse for power protection
- Zip ties to organize and secure wires
- Mounting bracket or adhesive for the camera
- Power source connection cables
- Video RCA cable or connector for signal transmission
Locate The Rear Camera And Car Stereo
Locating the rear camera and car stereo is the first step to connect them properly. Knowing their exact positions helps in making a smooth and safe installation. This section guides you through finding both parts easily.
Finding The Rear Camera
The rear camera is usually mounted near the back license plate. Check the bumper or trunk area. It may be hidden under a cover or integrated into the handle. Look for a small lens or a wire leading from that spot. Use a flashlight if needed to see clearly in dark places.
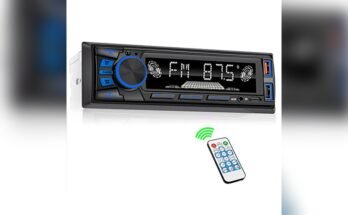
Accessing The Car Stereo
The car stereo sits in the center console of your vehicle’s dashboard. It looks like a screen or a panel with buttons. To access it, you might need to remove some trims or screws. Use a plastic tool to avoid damage. Keep track of removed parts for easy reassembly.
Prepare The Wiring
Preparing the wiring is a key step to connect a rear camera to your car stereo. It ensures a stable and clear video signal. The process starts by identifying the correct wires. Then, you strip and connect them carefully. Proper wiring prevents loose connections and signal loss. Take your time and follow each step carefully.
Identify Wiring Colors
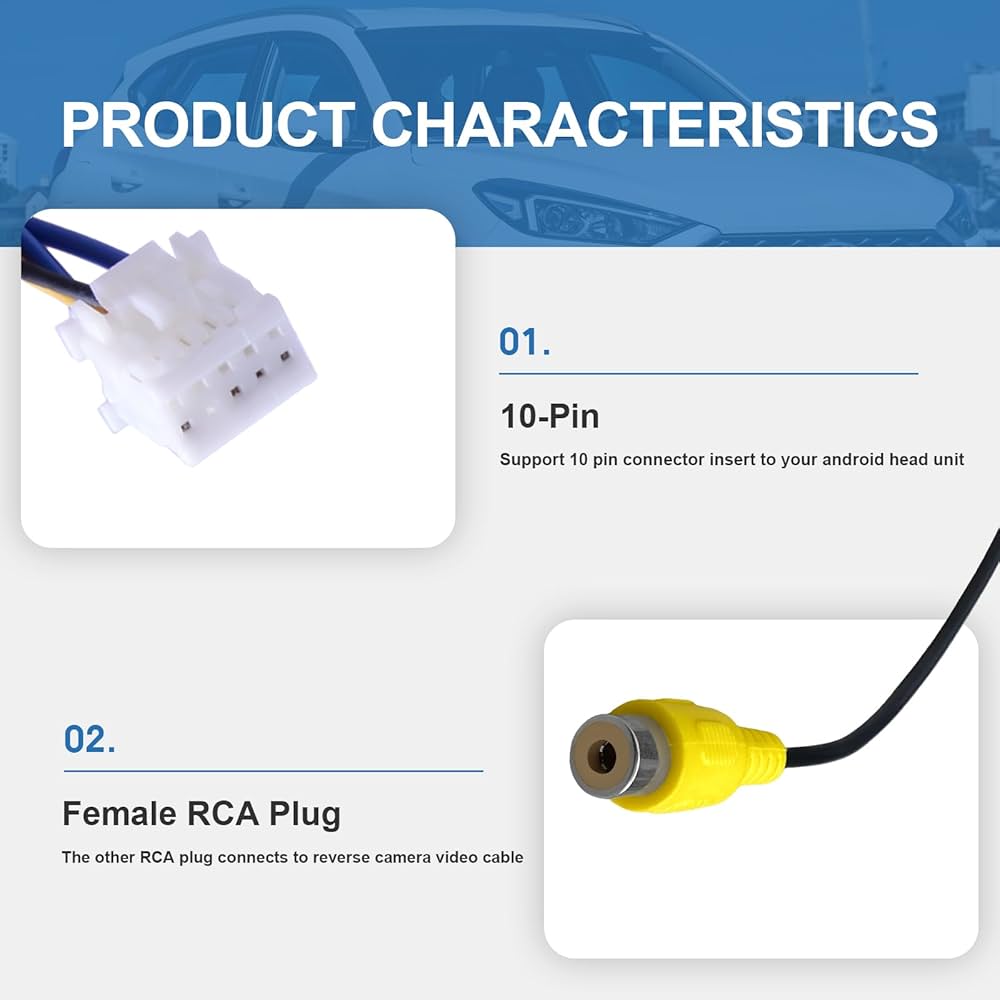
Look at the camera and stereo wiring harnesses. Each wire has a specific color and purpose. Common colors include red for power, black for ground, and yellow for video signal. Check the user manuals to confirm wire functions. Mark each wire to avoid confusion. Correct identification helps connect wires safely and correctly.
Strip And Connect Wires
Use a wire stripper to remove a small section of insulation. Expose about half an inch of copper wire. Twist the exposed wires to prevent fraying. Connect matching wires by twisting them together or using connectors. Secure connections with electrical tape or heat shrink tubing. Firm connections ensure stable signal and power flow.
Connect The Rear Camera To The Stereo
Connecting the rear camera to the car stereo allows you to see behind your vehicle. It helps in parking and increases safety. This part guides you through the steps to connect the rear camera properly. Follow each step carefully to avoid mistakes.
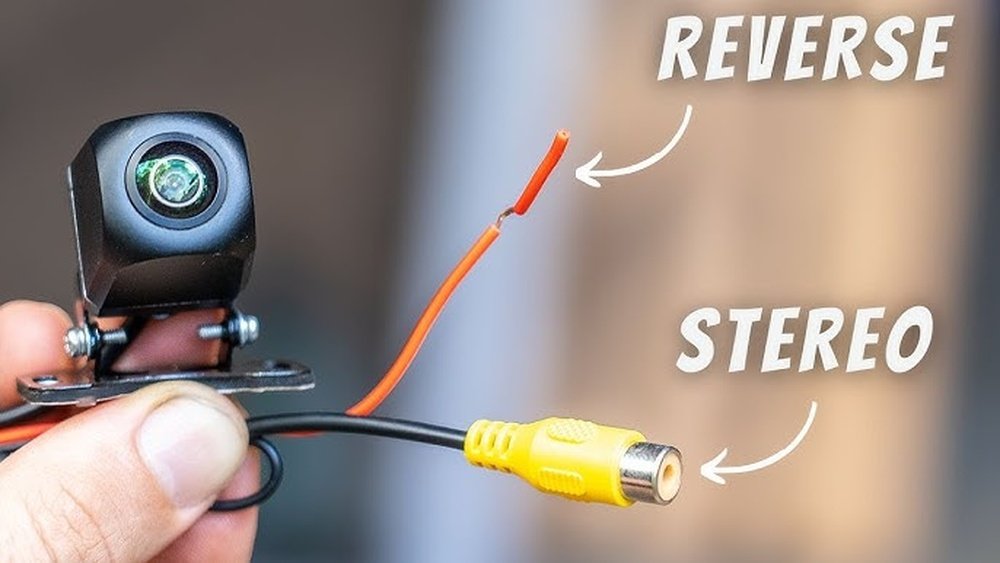
Locate The Video Input
First, find the video input on your car stereo. It is usually labeled as “Camera In” or “Video In.” The input is often a yellow RCA connector. Check your stereo manual if unsure about the location.
Attach The Camera Video Cable
Take the video cable from the rear camera. Plug the cable into the video input on the stereo. Make sure the connection is tight and secure. Loose connections can cause poor video quality.
Connect The Power Wires
Power wires need to be connected next. The camera usually has a red wire for power and a black wire for ground. Connect the red wire to the reverse light power wire. Attach the black wire to a good ground point on the car. This setup powers the camera only when reversing.
Test The Rear Camera
Testing the rear camera ensures it works correctly with your car stereo. This step is vital for safety and convenience. You can check the camera’s picture quality and angle before driving. Follow these simple actions to test the rear camera properly.
Turn On The Car Stereo
Start your car or switch the ignition to power the stereo. The car stereo should detect the rear camera automatically. If not, check the wiring or settings. Make sure the stereo is set to the correct input mode for the camera.
Verify Video Display
Look at the car stereo screen to see the camera’s video. The image should be clear and bright. Watch for any flickering or static. These issues might mean a loose connection or poor signal. Confirm the video shows the area behind your car correctly.
Adjust Camera Angle
Check the camera view on the screen. The angle should cover the rear area well. Move the camera up, down, left, or right to improve visibility. The goal is to see any obstacles or pedestrians clearly. Tighten the camera mount once the angle is right.

Secure And Hide The Wiring
After connecting your rear camera to the car stereo, securing and hiding the wiring is essential. Proper wire management keeps your car interior tidy and protects the wires from damage. It also prevents loose cables from interfering with driving or causing accidents. Follow simple steps to keep your wiring safe and out of sight.
Use Cable Ties
Cable ties help bundle wires neatly together. Group all cables running in the same direction and wrap a cable tie around them. Do not tighten too much to avoid damaging the wires. Space cable ties every few inches for a secure hold. This method reduces clutter and stops wires from dangling freely.
Tuck Wires Away Safely
Find gaps or panels inside your car to hide the wires. Tuck cables under door sills, carpets, or dashboard edges. Avoid sharp bends and keep wires away from moving parts. Use clips or adhesive mounts to hold wires in place. This keeps wiring out of sight and protects it from wear and tear.
Troubleshooting Common Issues
Connecting a rear camera to your car stereo can improve driving safety. Sometimes, problems can stop it from working well. Troubleshooting helps find and fix these common issues fast. Follow simple steps to get your camera back to normal.
No Video Signal
No video signal means the screen stays blank. Check the camera’s power connection first. Make sure all cables are plugged in tightly. Look for any broken wires or loose connectors. Verify the video input on the stereo matches the camera output. Try switching the video input to see if it shows the picture.
Poor Image Quality
Blurry or dark images reduce camera usefulness. Clean the camera lens gently with a soft cloth. Inspect the wiring for damage or corrosion. Check the camera settings on the stereo menu. Adjust brightness and contrast for better clarity. Ensure the camera is correctly aligned and not blocked by dirt.
Power Problems
The camera might not turn on due to power issues. Test the fuse connected to the camera circuit. Replace it if it is blown. Confirm the camera receives power from the reverse light wire. Use a multimeter to check voltage supply. Secure all ground connections to avoid power loss.
Frequently Asked Questions
How Do I Connect A Rear Camera To My Car Stereo?
To connect a rear camera, locate the stereo’s video input port. Run the camera’s video cable to this port. Connect the power cable to the reverse light circuit. This powers the camera only when the car is in reverse.
What Tools Are Needed For Rear Camera Installation?
You will need wire cutters, electrical tape, a screwdriver, and a multimeter. These tools help strip wires, secure connections, and test power sources. A drill may be required for mounting the camera.
Can Any Rear Camera Work With All Car Stereos?
No, compatibility depends on the stereo’s video input type and voltage. Check your stereo manual for supported camera specifications. Use a camera that matches these requirements for proper function.
How Do I Power The Rear Camera Correctly?
Connect the camera’s power wire to the reverse light power wire. This ensures the camera activates only when reversing. Use a multimeter to identify the correct reverse light wire safely.
Conclusion
Connecting a rear camera to your car stereo improves safety and convenience. It helps you see behind your vehicle clearly. The steps are simple if you follow the instructions carefully. Use the right wires and tools to avoid mistakes. Test the camera before driving to ensure it works well.
Enjoy easier parking and better awareness on the road. This small upgrade makes a big difference every day. Keep your vehicle safe with a clear rear view.