Have you ever wished your old car had a backup camera to make parking and reversing safer? Adding this modern feature doesn’t mean you have to buy a new vehicle.
You can upgrade your car with a backup camera yourself, and it’s easier than you might think. Imagine avoiding those blind spots and backing up with confidence every time. In this guide, you’ll discover simple steps to install a backup camera that fits your car and your budget.
Keep reading to learn how to bring this smart upgrade to your ride today.
Choosing The Right Backup Camera
Choosing the right backup camera for an old car improves safety and convenience. The right camera helps you see blind spots clearly. It also fits your vehicle’s setup without extra trouble. Consider the camera type, compatibility, and features before buying.
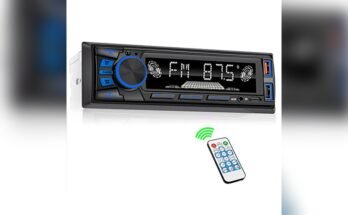
Types Of Backup Cameras
Backup cameras come in several types. Wired cameras connect directly to your car’s monitor. They offer stable video but need more installation work. Wireless cameras send signals without cables. They are easier to install but may face signal loss. Some cameras mount on the license plate. Others fit inside the rear bumper or tailgate. Choose the type that suits your car’s design and your skills.
Compatibility With Older Cars
Older cars may lack modern displays or wiring. Check if the camera works with your car’s screen or radio. Some cameras include a separate monitor. Others connect to existing screens via RCA or HDMI ports. Power supply is also important. Most cameras use the reverse light circuit for power. Make sure your car’s wiring can support this without problems. Verify the size and shape of the camera mount fits your car’s rear area.
Key Features To Consider
Look for clear video quality in both day and night. Night vision or infrared lights improve visibility in the dark. Wide viewing angles show more behind the car. Some cameras have guidelines to help judge distance. Waterproof and dustproof ratings ensure the camera lasts outdoors. Easy installation kits reduce hassle. Choose a camera with good reviews and warranty for peace of mind.
Gathering Necessary Tools And Materials
Before installing a backup camera on an old car, gather all necessary tools and materials. Having everything ready saves time and reduces frustration. Preparation is key to a smooth installation process.
Backup Camera Kit Components
A backup camera kit usually includes the camera, a monitor or display screen, and wiring harnesses. Some kits come with mounting brackets and screws. Check the kit contents carefully to ensure nothing is missing.
Additional Tools Required
Besides the kit, you will need a few extra tools. A power drill helps with mounting the camera. Wire strippers and electrical tape are essential for safe wiring. A screwdriver set and a multimeter will also be useful during installation.
Safety Precautions
Always disconnect the car battery before starting work. Wear gloves to protect your hands from sharp edges. Use eye protection when drilling or cutting wires. Follow all safety steps to avoid injury or damage to your vehicle.
Preparing Your Car For Installation
Preparing your car for a backup camera installation is an important first step. It ensures the process goes smoothly and the camera works well. Taking time now saves effort later. You need to find the right power source, decide where to mount the camera, and clean the area for installation. Let’s break down each part.
Locating Power Source
Find a power source that turns on with the car. The reverse light wire is a common choice. It powers the camera only when you back up. Use a voltage tester to confirm the wire. Avoid tapping into the wrong wire. This keeps your car’s electrical system safe.
Selecting Camera Mounting Spot
Choose a spot at the back of your car with a clear view. The center of the license plate area works well. Make sure the camera lens won’t get blocked by dirt or parts of the car. The height should be low enough to see the ground behind but high enough to avoid damage.
Cleaning And Accessing Installation Area
Clean the chosen area with soap and water. Remove dirt and grease for better camera grip. Dry it completely before mounting. Check for screws or panels you can remove to hide wires. This makes the installation neat and protects the wires from damage.

Installing The Backup Camera
Installing a backup camera on an old car is a smart way to improve safety. It helps you see behind your vehicle while reversing. The process involves mounting the camera, routing the wiring, and connecting power and ground. Each step is simple with basic tools and patience.
Mounting The Camera
Choose a spot near the license plate or rear bumper. Clean the area to ensure strong adhesion. Use the included brackets or screws to secure the camera. Make sure the lens faces directly backward. Adjust the angle for the best view.
Routing The Wiring
Run the camera wire through the car’s trunk or rear hatch. Hide the cable under trim panels or carpet for a neat look. Avoid sharp edges or moving parts that could damage the wire. Leave enough slack near the connection points.
Connecting To Power And Ground
Locate the reverse light wires in the tail light assembly. Use a test light to find the positive and negative wires. Connect the camera’s power wire to the reverse light’s positive wire. Attach the ground wire to a clean metal surface. This setup activates the camera only when reversing.
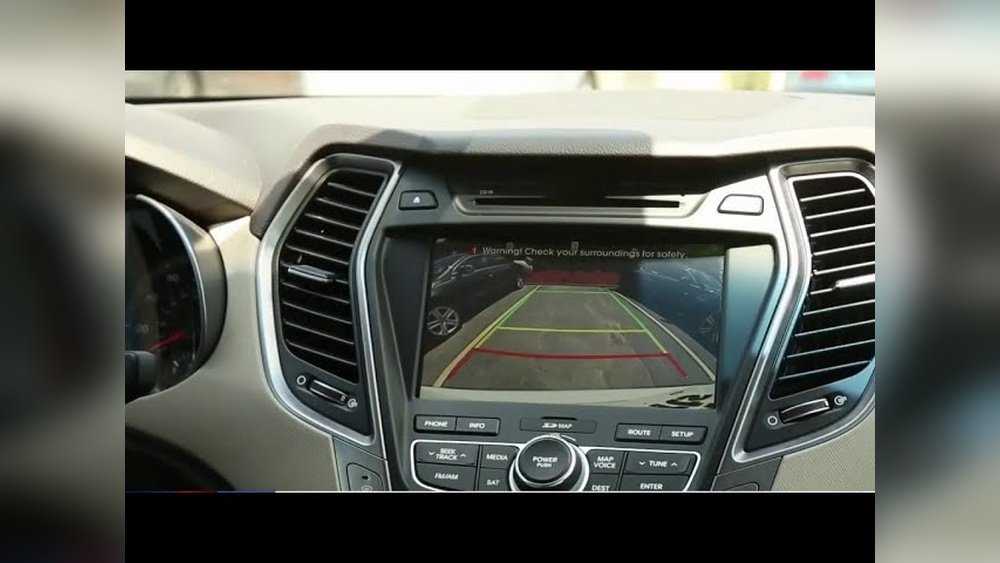
Setting Up The Monitor
Setting up the monitor is a key step in adding a backup camera to an old car. The monitor shows the camera’s view, helping you reverse safely. Proper placement and wiring are important for clear images and easy use. This section explains how to choose the right monitor, where to place it, how to wire it, and adjust the display settings.
Choosing Monitor Type And Location
Pick a monitor that fits your car and budget. Common types include dashboard-mounted, rearview mirror, or built-in screen. Dashboard monitors are easy to install and see. Rearview mirror monitors replace your existing mirror and keep your dashboard clean. Built-in screens are best for cars with factory-style setups. Place the monitor where you can see it without turning your head. Avoid spots with glare or direct sunlight. Test the view from the driver’s seat before fixing it permanently.
Wiring The Monitor
Connect the monitor to the backup camera using the right cables. Most systems use a power cable and video cable. Power the monitor from the car’s fuse box or cigarette lighter socket. Use a fuse tap for safety. Run the video cable from the camera, usually at the back of the car, to the monitor in the front. Hide cables under the car’s trim or carpet to keep them safe and neat. Secure all connections to avoid loose wires and signal loss.
Adjusting Display Settings
Turn on the monitor and check the image quality. Adjust brightness, contrast, and color settings for clear visibility. Set the image orientation if the picture is upside down or reversed. Many monitors let you flip or mirror the image. Test the camera view in different lighting conditions, like day and night. Make small changes until the picture is sharp and easy to see. Proper settings improve safety and confidence while reversing.
Testing And Troubleshooting
Testing and troubleshooting are key steps after installing a backup camera in an old car. They ensure the camera works correctly and delivers clear images. This process helps spot and fix issues early. Proper testing gives confidence in the camera’s performance. It also improves safety while reversing.
Verifying Camera Functionality
Turn on the car and shift into reverse. The backup camera screen should power on. Check if the image appears clearly. Test the camera in different lighting conditions. Make sure the picture is steady, not flickering. Listen for any unusual sounds from the camera. Confirm the guidelines on the screen match the car’s width. This step confirms the camera operates correctly.
Fixing Common Issues
No image or a black screen often means wiring problems. Check all connections for tightness and correct placement. Clean the camera lens from dirt or moisture. Blurry or distorted images may need lens adjustment or replacement. If the image flickers, inspect the power supply for stability. Sometimes, a reset of the camera or monitor resolves glitches. Follow the user manual for specific troubleshooting tips.
Optimizing Camera Angle
Adjust the camera angle to cover the rear view fully. Aim it slightly downward to capture the ground behind. Avoid pointing too high or too low. Test the angle by reversing near an obstacle. Ensure the camera shows a clear path without blind spots. Tighten the mounting bracket securely to keep the angle fixed. Correct angle improves safety and ease of parking.
Maintaining Your Backup Camera System
Maintaining your backup camera system keeps it working well. A clean and well-checked camera gives clear views. This helps avoid accidents and makes parking easier. Small care steps keep your system ready for daily use.
Regular Cleaning Tips
Clean the camera lens often to remove dirt and dust. Use a soft cloth and mild soap with water. Avoid strong chemicals that can damage the lens. Wipe gently to keep the lens clear and scratch-free. Clean after rain or mud splashes for best results.
Checking Connections
Check the wires and plugs to ensure they are tight and safe. Look for loose or damaged cables around the camera and screen. Fix any loose connections quickly to prevent signal loss. Secure cables away from heat or moving parts to avoid damage.
Updating System Components
Keep your backup camera software up to date for better performance. Check the manufacturer’s website or app for updates. Replace worn parts like cables or mounts if needed. Updated parts help your system stay reliable and clear.
Frequently Asked Questions
How Do I Install A Backup Camera In An Old Car?
To install a backup camera, choose a compatible camera kit. Mount the camera near the license plate. Connect wiring to the reverse light and display screen. Follow the manufacturer’s instructions for power and signal connections.
What Tools Are Needed To Add A Backup Camera?
Common tools include a drill, screwdrivers, wire strippers, electrical tape, and a multimeter. These help mount the camera and connect wiring safely. Having a vehicle manual also aids in locating wiring points.
Can I Install A Backup Camera Without Professional Help?
Yes, many kits are designed for DIY installation. Clear instructions and basic tools are required. However, if wiring or mounting seems complex, consulting a professional is safer and ensures proper function.
Will A Backup Camera Work With My Existing Car Display?
It depends on your car’s display compatibility. Some cameras connect via RCA or USB inputs. If your car lacks a screen, consider installing an aftermarket monitor or using a wireless camera with a smartphone app.
Conclusion
Adding a backup camera to an old car improves safety and convenience. It helps you see blind spots and park with ease. Installation can be simple with the right tools and instructions. Choose a camera that fits your car and budget.
Taking this step makes driving safer for you and others. Start today and enjoy the benefits of a backup camera. It is a smart upgrade for any older vehicle.