Want to upgrade your car with a brand-new stereo but don’t know where to start? You’re in the right place.
Installing a car stereo might seem tricky, but with the right steps, you can do it yourself and save money. Imagine enjoying your favorite music with better sound quality, all from a system you installed. Keep reading, and you’ll discover how simple it can be to transform your car’s audio experience—no special skills needed.
Let’s get started!
:max_bytes(150000):strip_icc()/installcarradio-5ae8d072fa6bcc003602b6af.jpg)
Tools And Materials Needed
Installing a car stereo needs the right tools and materials. Prepare everything before starting. This helps the process go smoothly and saves time. Knowing what you need prevents frustration and mistakes.
Gathering all items first makes the job easier. The tools must be suitable for car electronics. Materials should match your car model and stereo type.
Essential Tools
Start with basic tools like screwdrivers. A flat-head and a Phillips screwdriver work well. Wire strippers help remove insulation from wires. Crimp connectors secure wire connections tightly. A panel removal tool prevents damage to car panels. Electrical tape insulates and protects wires. A multimeter checks electrical connections and voltage. Have these tools ready before you begin.
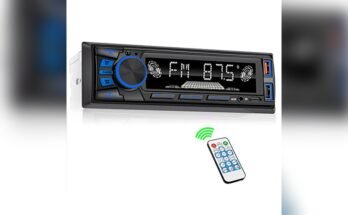
Choosing The Right Stereo
Pick a stereo that fits your car’s dashboard. Check the stereo size and shape. Match the stereo’s wiring harness with your car’s system. Consider features like Bluetooth, USB, or CD player. Choose a model that meets your needs and budget. A compatible stereo makes installation easier and faster.
Additional Accessories
Some extras improve your installation experience. Wiring harness adapters connect the stereo without cutting wires. Mounting kits help secure the stereo in place. Antenna adapters connect the car antenna to the new stereo. Extra connectors and fuses add safety. Keep these accessories handy for a clean, professional finish.
Preparing Your Vehicle
Preparing your vehicle is a key step before installing a new car stereo. This process makes sure everything is safe and ready for the new system. Taking your time here helps avoid problems later. Follow the steps carefully to protect your car’s electrical system and get a smooth installation.
Disconnecting The Battery
Start by disconnecting the negative battery cable. This stops any electrical current from flowing. It helps prevent short circuits or shocks during the work. Use a wrench to loosen the battery terminal. Always remove the negative cable first to keep safety. Keep the cable away from the battery post.
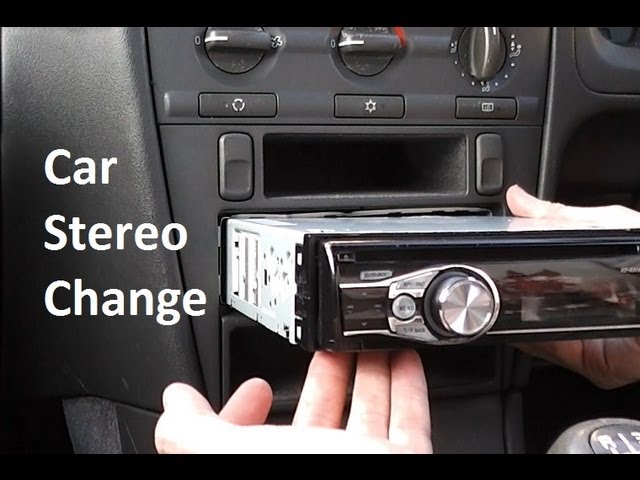
Removing The Old Stereo
Next, take out the old stereo from the dashboard. Look for screws or clips holding it in place. Use the right tools like screwdrivers or trim removal tools. Pull the stereo out gently. Unplug all wiring connectors from the back of the unit. Keep track of any screws or parts you remove.
Inspecting Wiring And Connectors
Check all wires and connectors for damage or wear. Look for frayed wires, loose connections, or corrosion. Clean any dirty connectors with a dry cloth. Make sure all wires are correctly labeled or marked. Repair or replace damaged wiring before installing the new stereo. This ensures a safe and strong connection.
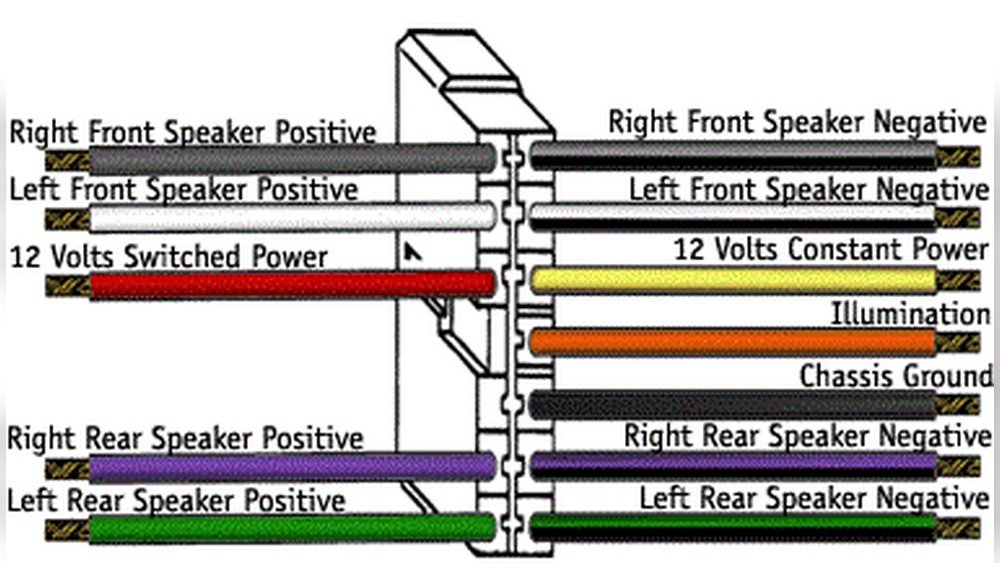
Wiring The New Stereo
Wiring the new stereo is a key step in installing your car audio system. Proper wiring ensures the stereo works well and lasts longer. It involves matching wires, using a wiring harness, and securing connections tightly. This section explains these steps clearly and simply.
Matching Wire Colors
Each wire in your car stereo has a color code. These colors tell you what each wire does, like power, ground, or speakers. Match the new stereo wires with the car’s wires by color. This keeps the right wires connected. If colors differ, check the stereo’s manual for help.
Using A Wiring Harness
A wiring harness makes connections easier and safer. It fits between the car wires and the new stereo. The harness has plugs that match your car’s wiring. This tool saves time and prevents cutting wires. It also helps keep your car’s original wiring intact.
Securing Connections
Secure connections stop wires from coming loose. Use wire connectors, electrical tape, or soldering to hold wires firmly. Loose wires cause poor sound or no power. After connecting, gently pull each wire to check it is tight. Good connections make your stereo work better and last longer.
Mounting The Stereo
Mounting the stereo is a key step in installing a new car stereo. It means putting the stereo unit into the car’s dash space. This step must be done carefully to ensure the stereo fits well and works properly. A proper mount keeps the stereo secure and prevents damage while driving.
Fitting The Stereo Into The Dash
Start by sliding the stereo into the dash opening. Check that the wires do not get pinched or stuck behind the unit. Push the stereo in until it sits flush with the dash surface. The fit should be snug but not forced. If the stereo feels too tight, adjust the dash opening or wiring.
Using Mounting Kits
Use a mounting kit designed for your car model. These kits include brackets and screws to hold the stereo firmly. Attach the brackets to the sides of the stereo. Then, secure the stereo inside the dash using the screws. Mounting kits help align the stereo and prevent shaking.
Testing The Fit
After mounting, test the fit by gently shaking the stereo. It should not move or wiggle. Check all buttons and knobs for easy access. Make sure the stereo face is visible and not blocked. A good fit improves both appearance and sound quality.
Finalizing Installation
Finalizing the installation of your car stereo is the last step to enjoy your new sound system. This phase ensures everything is connected properly and working as expected. Follow these simple steps to complete your setup with confidence.
Reconnecting The Battery
Begin by reconnecting the car battery. This restores power to your vehicle’s electrical system. Secure the battery terminals tightly to avoid loose connections. Double-check for any tools or wires left inside the dashboard. Safety first—ensure the car is off before reconnecting.
Powering On And Testing
Turn on your car and power up the stereo. Listen carefully for any unusual sounds or static. Test all functions: radio, CD player, Bluetooth, and auxiliary input. Check that the display lights up properly. Make sure the stereo responds to controls without delay.
Adjusting Sound Settings
Adjust the bass, treble, and balance to suit your taste. Set the volume to a comfortable level before driving. Fine-tune the fader to balance sound between front and rear speakers. Use presets to save your favorite sound settings. Small changes improve your listening experience greatly.
Troubleshooting Common Issues
Troubleshooting common issues is important after installing a car stereo. Problems can stop your stereo from working well. Fixing these problems helps you enjoy music without interruptions.
Some issues happen often and have simple solutions. Checking these can save time and avoid damage. Understanding these problems is useful for every car owner.
No Power Or Sound
Check the car’s fuse first. A blown fuse can cut power to the stereo. Replace the fuse if needed. Make sure the stereo is properly connected to the power wires.
Test the wiring harness to see if power reaches the stereo. Verify the ignition is on. Some stereos only work with the key turned.
Interference And Noise
Noise can come from bad ground connections. Ensure the stereo is grounded to a clean metal part of the car. Avoid running audio wires near power cables.
Try using shielded cables for speakers. Electronic devices like phones or chargers can cause interference. Keep these devices away from the stereo system.
Loose Connections
Loose wires cause many problems like no sound or power loss. Check all wire connections carefully. Push connectors firmly into the stereo and harness.
Look inside the dashboard for loose or disconnected wires. Secure all connections to prevent them from moving while driving. Use electrical tape or wire ties to hold wires in place.
Tips For Better Sound Quality
Good sound quality makes driving more enjoyable. Simple changes can improve your car stereo’s sound a lot. These tips help you get clear, rich audio from your system.
Upgrading Speakers
Old factory speakers often limit sound quality. Choose speakers with better materials and design. Look for those with good frequency response and power handling. New speakers deliver clearer highs and deeper bass. Proper speaker placement also affects sound clarity.
Using Sound Dampening Materials
Road noise and vibrations reduce sound quality inside the car. Adding sound dampening materials cuts unwanted noise. Use foam, mats, or specialized damping sheets inside doors and panels. This reduces rattles and echo, making music sound cleaner. It also improves bass performance by reducing vibrations.
Fine-tuning Equalizer Settings
Adjust the equalizer to suit your music and car acoustics. Increase or decrease bass, midrange, and treble frequencies. Small changes create a balanced, pleasant sound. Test with different songs to find the best setting. Avoid extreme boosts that cause distortion.

Frequently Asked Questions
What Tools Are Needed To Install A Car Stereo?
You need a screwdriver, wire strippers, electrical tape, and a wiring harness adapter. A panel removal tool helps avoid damage. These tools make the installation safe and efficient.
How Do I Connect Wires For A Car Stereo?
Match each wire by color using the wiring diagram. Use wire connectors or solder for secure connections. Always insulate connections with electrical tape to prevent shorts.
Can I Install A Car Stereo Myself Safely?
Yes, with proper tools and instructions, DIY installation is safe. Disconnect the car battery first to avoid electrical shocks. Follow the manual carefully for best results.
How Long Does It Take To Install A Car Stereo?
Installation usually takes 1 to 2 hours depending on experience. Complex setups or additional components may increase time. Taking your time ensures a proper and secure installation.
Conclusion
Installing a car stereo can be simple with the right steps. Take your time and follow each instruction carefully. Double-check all connections before powering on the system. A good stereo improves your driving experience and sound quality. Stay safe by disconnecting the battery during installation.
Enjoy your favorite music with clear sound on every trip. Practice makes perfect, so don’t worry if it takes a bit longer. Soon, you will feel confident handling car audio upgrades yourself.