Are you ready to upgrade your car’s audio without the hassle? Installing a car stereo with a harness might sound tricky, but it’s simpler than you think.
With the right steps, you can have better sound and a cleaner look in no time. This guide will walk you through everything you need to know, making the process smooth and stress-free. Stick with me, and by the end, you’ll feel confident handling your car stereo installation like a pro.
Let’s get started!

Tools And Materials Needed
Installing a car stereo with a harness needs the right tools and materials. Using proper items makes the process smooth and safe. It also helps avoid damage to your vehicle or stereo. This section covers the essential tools, how to pick the right harness, and extra accessories you might need.
Essential Tools
You need a few basic tools for the installation. A screwdriver set with flathead and Phillips heads is a must. Wire strippers help prepare wires for connections. Crimping tools secure wire connectors firmly. A multimeter checks electrical connections and voltage. Electrical tape keeps wires insulated and safe. A panel removal tool helps avoid scratches when removing dashboard parts.
Choosing The Right Harness
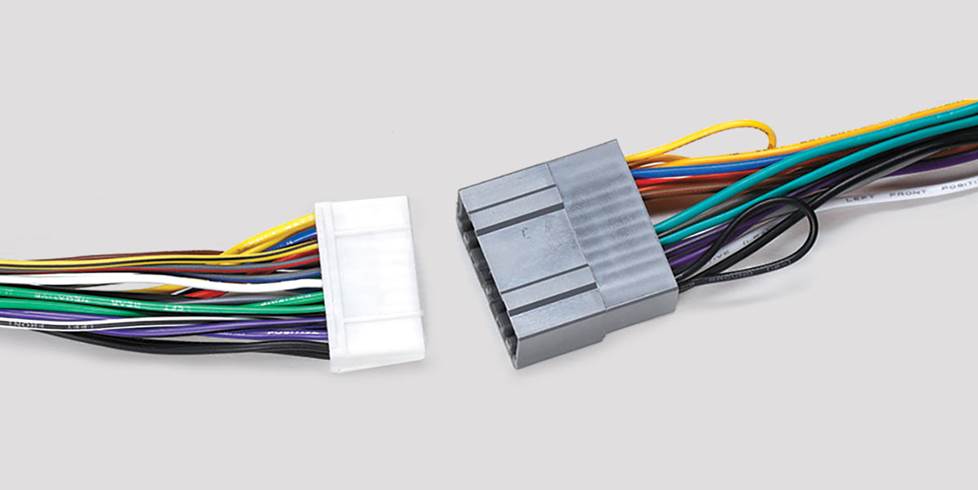
Pick a harness made for your car model. It should match your stereo and vehicle wiring. A harness with color-coded wires makes connections easier. Using the correct harness avoids cutting factory wires. It keeps your car’s electrical system intact. Check compatibility with your stereo brand and model before buying.
Additional Accessories
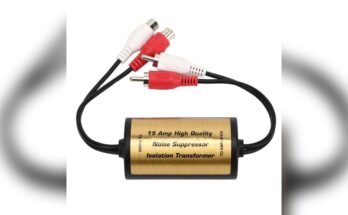
Some extra items can help during installation. Wire connectors like butt connectors or soldering kits ensure strong joins. Zip ties keep wires organized and tidy. A fuse holder protects the stereo from power surges. Foam tape or rubber gaskets can reduce vibration noise. These accessories improve installation quality and stereo performance.
Preparing Your Vehicle
Preparing your vehicle is the first step in installing a car stereo with a harness. This stage ensures safety and makes the installation process smooth. You must carefully get your car ready before starting any work on the stereo system.
Disconnecting The Battery
Start by disconnecting the car battery. This step prevents electrical shocks and short circuits. Use a wrench to remove the negative cable first. Then, take off the positive cable. Keep the cables away from the battery terminals to avoid accidents.
Removing The Old Stereo
Next, remove the old stereo from the dashboard. Check for screws or clips holding it in place. Use a screwdriver or panel removal tool to loosen them. Pull the stereo out gently to avoid damaging wires. Disconnect the wiring harness and antenna cable carefully.
Inspecting Wiring And Connectors
Look at the wiring and connectors inside the dashboard. Check for any damage or corrosion on the wires. Make sure connectors are clean and fit well. Fix any loose or broken wires before installing the new stereo. This step helps avoid connection problems later.
Connecting The Wiring Harness
Connecting the wiring harness is a key step in installing a car stereo. It links the stereo to the car’s electrical system. Proper connection ensures the stereo works correctly and safely. Take your time to match and join wires carefully. This avoids damage and poor sound quality.
Matching Wire Colors
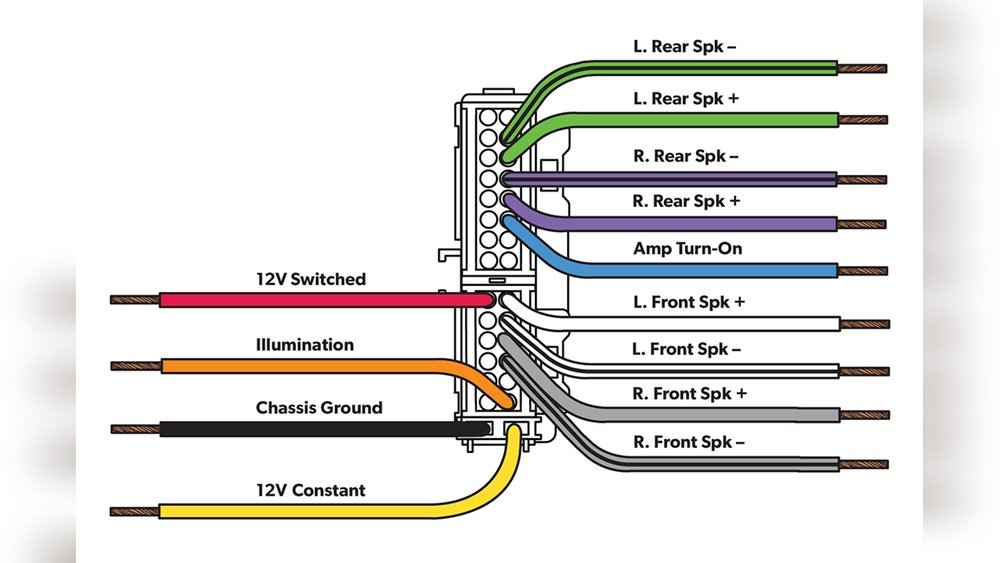
Each wire in the harness has a color code. These colors match the wires in your car. Find the wire colors on both the stereo harness and the car’s wiring. Match each wire by color before connecting. This helps avoid wrong connections. Use a wiring diagram if you have one. It makes matching easier and clearer.
Splicing And Securing Connections
Cut wires cleanly before joining them. Strip about half an inch of insulation off each wire. Twist the wire ends together tightly. Secure the connection with electrical tape or heat shrink tubing. This protects the connection from moisture and vibration. Loose connections cause static or signal loss. Take care to keep wires neat and tight.
Using Crimp Connectors Or Soldering
Crimp connectors make strong, quick joins. Slide a connector over twisted wires. Use a crimp tool to press it firmly. Soldering is a more permanent option. Heat the wires and apply solder to join them. Cover the joint with heat shrink tubing. Both methods ensure good electrical contact. Pick the one you feel most comfortable using.
Installing The New Stereo
Installing the new stereo is a key step in upgrading your car’s audio system. This process involves fitting the unit securely, reconnecting power, and testing to ensure everything works well. Taking these steps carefully helps avoid damage and ensures clear sound.
Mounting The Stereo Unit
First, place the stereo unit into the dash opening. Align the mounting brackets with the screw holes. Use screws to fasten the stereo firmly. Make sure the unit sits flush and does not move. This keeps the stereo safe from vibrations while driving.
Reconnecting The Battery
Next, reconnect the car battery’s negative terminal. Tighten the clamp securely to restore power. This step powers the stereo and other electronics. Be cautious to avoid short circuits or sparks. A secure connection helps the system run smoothly.
Testing The System
Turn on the stereo and test all functions. Check the radio, CD player, or Bluetooth connection. Listen for clear sound and no static noise. Test the volume controls and preset buttons. Confirm the display lights up and responds correctly. This ensures the stereo is installed properly and ready for use.
Troubleshooting Common Issues
Troubleshooting common issues can save time and frustration during car stereo installation. Some problems may stop your stereo from working properly. Knowing how to fix these issues helps you enjoy your music faster.
No Power Or Sound
Check all wiring connections first. Loose or wrong wires cause no power or sound. Make sure the harness connects firmly to the stereo and car wires. Inspect the fuse on the car’s fuse box. A blown fuse stops power flow. Replace it if needed. Test the car battery to confirm it has enough charge. Try turning the stereo on again after these checks.
Static Or Interference
Static noise often results from bad wiring or grounding. Ensure the ground wire is connected to bare metal on the car frame. Avoid running audio wires next to power cables. Keep antenna cables tight and clean. Check for damaged or old cables that may cause interference. Replace any faulty wires to clear static sounds.
Button Or Display Problems
Buttons that don’t respond or blank displays may mean poor connections. Remove the stereo and inspect the wiring harness for bent pins or loose plugs. Make sure the stereo is fully seated in its mount. Reset the stereo by disconnecting the car battery for a few minutes. This can solve minor software glitches. Clean the buttons gently to remove dust or dirt that may block them.
Tips For A Clean Installation
Installing a car stereo with a harness is easier with a clean setup. A neat installation looks good and works better. It stops wires from tangling and parts from moving around. Follow these tips for a tidy and safe car stereo installation.
Organizing Wires
Keep wires grouped by function or color. Use zip ties to bundle wires together. Avoid tight bends or sharp twists in wires. Label wires with tape to identify each one. This helps with future repairs or upgrades.
Using Dash Kits
Dash kits fit your stereo perfectly into the car. They cover gaps and give a smooth look. Choose a dash kit made for your car model. Follow the kit’s instructions for easy installation. A good dash kit makes the stereo look factory-made.
Securing Loose Components
Loose parts can cause noise or damage in the car. Use screws or brackets to fasten the stereo firmly. Check that no wires are pinched or stretched. Place foam or rubber pads to reduce vibrations. Secure everything before testing the stereo.

Frequently Asked Questions
What Tools Are Needed To Install A Car Stereo With Harness?
You need wire strippers, crimp connectors, electrical tape, a screwdriver, and the stereo harness. These tools ensure a secure and safe installation.
How Does A Harness Simplify Car Stereo Installation?
A harness connects the stereo wires to the car’s wiring without cutting. It prevents electrical damage and makes installation faster and easier.
Can I Install A Car Stereo With Harness Myself?
Yes, with basic tools and instructions, you can install a car stereo with a harness. It’s beginner-friendly and saves installation costs.
How Do I Match Harness Wires To My Car Stereo?
Match wire colors from the harness to the stereo’s wiring diagram. This ensures correct connection of power, speakers, and ground wires.
Conclusion
Installing a car stereo with a harness is simple and safe. The harness makes wiring easier and avoids mistakes. Follow the steps carefully and check connections twice. Take your time and use the right tools. Soon, you will enjoy better sound in your car.
This guide helps anyone upgrade their stereo system. Feel confident and enjoy your new setup.