If you’re looking to keep your RV journeys safe and capture every moment on the road, powering a dash cam is essential. But how do you make sure your dash cam stays on without draining your RV’s battery or causing wiring headaches?
You’re about to discover simple, effective ways to power your dash cam that fit your RV setup perfectly. By the end of this article, you’ll have the confidence to install and power your dash cam like a pro, ensuring your travels are recorded smoothly and worry-free.
Let’s dive in and get your dash cam powered up the right way!

Dash Cam Power Needs
Dash cams need steady power to work well in an RV. Understanding what power your dash cam requires is key. This helps you pick the right source and avoid problems. Dash cams usually need low voltage and steady current. They run best with clean and constant power.
Voltage And Current Basics
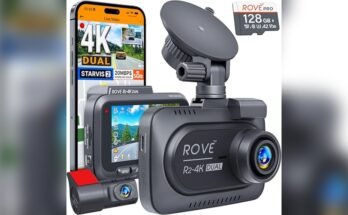
Dash cams mostly use 5 volts of power. This is the same as many phone chargers. They also need a small current, often under 2 amps. Voltage is the force that pushes electricity. Current is the flow of electric charge. Too much voltage can break your dash cam. Too little voltage makes it stop working.
Most dash cams have a built-in voltage regulator. This keeps the voltage steady for the camera. Still, it is best to provide correct voltage from the start. The current should match what the dash cam needs. A power source with higher current is safe. The camera will only draw what it uses.
Common Dash Cam Power Sources
Many RV owners use the 12-volt cigarette lighter socket. This socket is easy to access and supplies steady power. You can use a USB adapter plugged into it. This changes 12 volts to 5 volts for the dash cam.
Another option is hardwiring the dash cam to the RV’s fuse box. This method gives constant power and looks neat. It also lets the dash cam run even when the engine is off. Use a voltage regulator or fuse to protect the dash cam.
Some dash cams come with a backup battery. This battery keeps the camera running without direct power. It is useful for short stops or when the RV is parked.

Using The Rv’s 12v Power Outlet
Using the RV’s 12V power outlet is a simple way to power your dash cam. Most RVs come with multiple 12V outlets designed for accessories. These outlets provide a steady power supply for small devices like dash cams. This method avoids complicated wiring or battery packs. It is easy to set up and works while you drive or park.
Locating The Best Outlet
Find a 12V outlet near the dashboard or front seats. This location keeps your dash cam cable tidy and short. Check the owner’s manual if unsure where the outlets are. Some RVs have outlets in the center console or under the dash. Avoid outlets that turn off when the engine is off. Choose one that stays on to keep the dash cam powered continuously.
Plug-and-play Adapters
Use a plug-and-play adapter designed for dash cams. These adapters fit directly into the 12V outlet. They often include a fuse for safety. The cable runs easily from the outlet to the dash cam mount. Some adapters have a built-in voltage regulator to protect your device. This option requires no tools and is user-friendly. It helps keep your dash cam powered without extra batteries or complex installs.
Hardwiring To The Rv Fuse Box
Hardwiring a dash cam to the RV fuse box is a reliable power method. It keeps the camera running without needing a cigarette lighter adapter. This setup connects the dash cam directly to your RV’s electrical system. It ensures constant power, even when the engine is off. Hardwiring also helps hide cables for a cleaner look inside your RV.
Benefits Of Hardwiring
Hardwiring offers steady power to the dash cam. It avoids loose connections that adapters can cause. The dash cam can run 24/7, which is great for security. It also saves the RV’s battery by connecting to circuits that turn off with the ignition. This setup reduces cable clutter and keeps the interior tidy.
Step-by-step Installation
Start by locating the RV fuse box. Identify a fuse that powers with the ignition. Use a fuse tap to connect the dash cam’s power wire. Attach the ground wire to a clean metal surface. Secure all wires with zip ties to prevent movement. Test the dash cam to confirm it powers on with the ignition. Make sure all connections are tight and safe.
Safety Precautions
Turn off the RV’s main power before starting. Use a multimeter to check voltage levels. Avoid tapping into high-amperage circuits to prevent damage. Use the correct fuse size for the dash cam. Keep wires away from moving parts and heat sources. Double-check all connections to prevent shorts or fire risks. If unsure, consult a professional electrician.
Battery Packs And Power Banks
Battery packs and power banks provide flexible power for your RV dash cam. These devices offer portable energy without direct connection to your RV’s main power system. They are easy to carry and use anywhere. Ideal for camping spots without power outlets or long drives, battery packs keep your dash cam running smoothly.
Using battery packs means less wiring hassle. You avoid complex installations and potential battery drain on your RV. Choose a power bank with enough capacity to match your dash cam’s needs. This ensures continuous recording and safety on the road.
Portable Power Options
Battery packs come in various sizes and power levels. Small power banks fit in your hand and charge devices quickly. Larger ones offer more energy but weigh more. Some models have USB ports, perfect for dash cams that charge via USB cables. Others include 12V outputs, ideal for direct dash cam connection. Portability means easy movement from one vehicle to another.
Charging And Capacity
Check the capacity of the battery pack before buying. It is measured in milliampere-hours (mAh). Higher mAh means longer power supply. For dash cams, a 10,000 mAh power bank can provide several hours of recording. Charging time varies by model but usually takes a few hours with a fast charger. Keep your battery pack fully charged before trips. This avoids power loss during your journey.
Using An Inverter For Ac Dash Cams
Using an inverter is a popular way to power AC dash cams in an RV. Dash cams that need AC power cannot plug directly into the RV’s DC system. An inverter changes the RV’s battery power from DC to AC. This lets you use regular household devices like your dash cam. It keeps your camera running smoothly while you drive or park.
Choosing the right inverter is important. It affects the dash cam’s performance and battery life. Installing the inverter properly ensures safety and reliable power supply.
Choosing The Right Inverter
Select an inverter that matches the dash cam’s power needs. Check the wattage of your dash cam and pick an inverter with a bit more power. This prevents overload and damage.
Pure sine wave inverters work best for sensitive electronics like dash cams. They provide clean and stable power. Modified sine wave inverters are cheaper but may cause noise or errors.
Consider the inverter’s size and weight. Compact models save space in your RV. Also, look for inverters with built-in safety features like overload protection and temperature control.
Installation Tips
Place the inverter close to the battery but away from heat or moisture. Use thick cables to connect the inverter to the battery for less power loss.
Secure all connections tightly to avoid sparks or shorts. Add a fuse near the battery connection for extra safety.
Keep the inverter ventilated to stop overheating. Avoid placing it near flammable materials. Test the setup before relying on it for long trips.

Solar Power Solutions
Solar power offers a clean and reliable way to power a dash cam in an RV. It uses sunlight, which is free and abundant during travel. This method reduces reliance on the RV’s main battery and lowers power costs. Solar setups can keep your dash cam running day and night without interruptions.
Integrating Solar Panels
Start by installing solar panels on the RV roof. Choose panels sized to fit your RV and power needs. Connect the panels to a charge controller to manage energy flow. This setup captures sunlight and turns it into usable electricity. Proper positioning of panels ensures maximum sunlight exposure. Wiring must be secure and weatherproof for safety. Solar panels provide steady power during daytime travel and stops.
Battery Storage For Continuous Power
Use a deep-cycle battery to store solar energy. It holds power for use when sunlight is unavailable. Connect the battery to the solar system and the dash cam. A battery monitor helps track charge levels. This storage keeps the dash cam running at night or in cloudy weather. Batteries need regular checks to maintain health and capacity. Combining solar panels with batteries ensures constant dash cam power.
Power Management Tips
Power management is important for using a dash cam in an RV. It helps keep the camera running without draining the RV’s battery. Good power management makes sure your dash cam works well during trips and stays ready when you need it.
Avoiding Battery Drain
Dash cams use power even when the RV is off. This can drain the battery quickly. Use a hardwire kit with a low-voltage cutoff feature. It stops the camera from using power when the battery is low. Also, turn off the dash cam when you park for long times. This saves battery life and keeps your RV ready to start.
Using Timers And Switches
Timers help control when the dash cam is on. Set a timer to turn the camera off during rest times. This avoids unnecessary power use. Manual switches let you turn the camera on and off easily. You can choose when to record and save battery. Both timers and switches give you control over power use.
Frequently Asked Questions
How Do I Power A Dash Cam In An Rv?
You can power a dash cam in an RV using the 12V cigarette lighter socket or hardwiring it to the RV’s fuse box. Both methods provide constant power. Hardwiring offers a cleaner installation and can support parking mode features.
Can I Use My Rv Battery To Power The Dash Cam?
Yes, the RV battery can power the dash cam if wired correctly. Use a voltage regulator to prevent damage. Make sure the dash cam doesn’t drain the battery when the RV is off to avoid battery depletion.
Is It Safe To Hardwire A Dash Cam In An Rv?
Hardwiring a dash cam in an RV is safe if done properly. Use a fuse tap and connect to an appropriate fuse slot. Ensure the wiring is secure and insulated to prevent short circuits or damage to the RV’s electrical system.
What Is The Best Power Source For An Rv Dash Cam?
The best power source depends on your needs. For easy setup, use the 12V socket. For continuous power and parking mode, hardwire to the fuse box with a low-voltage cutoff to protect the battery.
Conclusion
Powering a dash cam in an RV is simple with the right method. Choose a power source that fits your setup and needs. Make sure to use safe and secure connections. Test the dash cam before hitting the road. This keeps your travels safe and records every moment.
A well-powered dash cam gives peace of mind during trips. Stay prepared and enjoy your RV adventures confidently.