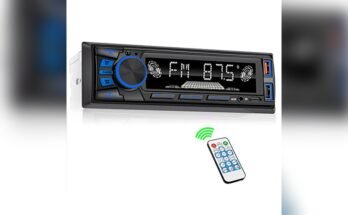
Are you ready to upgrade your car’s audio experience? Installing a double din car stereo might seem tricky, but with the right steps, you can do it yourself and save time and money.
Imagine enjoying clearer sound, better features, and a modern look in your car—all from an easy installation you control. In this guide, you’ll find simple, step-by-step instructions that anyone can follow. By the end, you’ll have the confidence to transform your car’s dashboard and enjoy your favorite music like never before.
Let’s get started!
Tools And Materials Needed
Installing a double din car stereo requires the right tools and materials. Having them ready makes the process smooth and safe. This section lists what you need to start your installation.
Essential Tools
- Screwdrivers – both flathead and Phillips types
- Wire stripper and cutter
- Socket wrench set
- Electrical tape
- Panel removal tool
- Multimeter for testing wires
- Crimping tool for secure wire connections
Optional Accessories
- Wiring harness adapter – matches your car and stereo
- Dash kit – fits the new stereo into your dashboard
- Backup camera kit – if you want added safety
- Bluetooth microphone – for hands-free calls
- Extension wires – for longer connections
- Fuse tap – to safely add power sources

Preparing Your Vehicle
Preparing your vehicle is the first step in installing a double din car stereo. This step ensures safety and makes the installation easier. Take your time and follow each instruction carefully.
Before you start, gather all the tools you need. Check your car’s manual for specific details about your stereo system. Prepare a clean workspace inside your car to keep screws and parts safe.
Disconnecting The Battery
Always disconnect the car battery before working with electrical parts. This prevents short circuits and protects you from electric shocks. Use a wrench to remove the negative terminal first. Then, remove the positive terminal. Keep the cables away from the battery to avoid accidental contact.
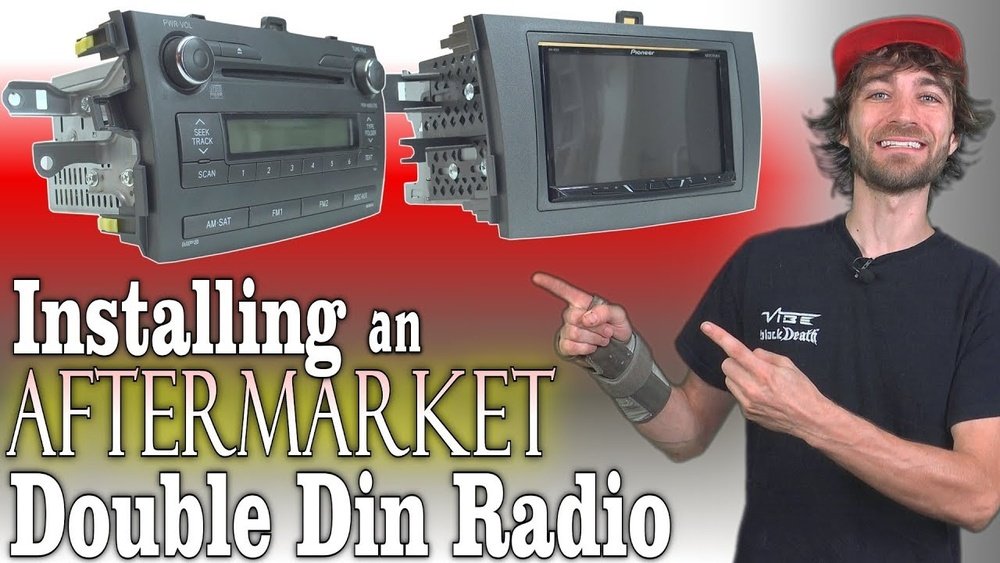
Removing The Old Stereo
Carefully remove the trim around the stereo. Use a plastic pry tool to avoid damaging the dashboard. Unscrew the bolts holding the stereo in place. Gently pull the stereo out, but do not force it. Disconnect the wiring harness and antenna cable. Keep all screws and parts for the new installation.
Wiring The Double Din Stereo
Wiring the double din stereo is a key step in the installation process. It involves connecting several wires to ensure the stereo works correctly. Careful attention to wiring guarantees clear sound and proper power supply.
Incorrect wiring can cause malfunctions or damage. Taking time to identify and connect wires properly is important. This section guides you through each step clearly and simply.
Identifying Wires
Start by looking at the wire colors and labels. Each wire has a specific job, like power, ground, or speakers. Use the stereo’s manual to match each wire to its function. Common colors include red for power and black for ground. Mark wires if needed to avoid confusion later.
Connecting Harnesses
Use the wiring harness adapter to connect the stereo to your car’s wiring. This adapter fits perfectly and prevents cutting factory wires. Push each wire into the correct slot on the harness. Double-check connections to avoid mistakes. The harness keeps wires organized and secure.
Securing Wiring Connections
After connecting, secure wires with electrical tape or wire connectors. This prevents wires from loosening or shorting. Tuck wires neatly behind the dashboard. Avoid tight bends or pulling on wires. Proper securing protects wiring and ensures the stereo works for a long time.

Mounting The Stereo
Mounting the stereo is an important step in installing your new Double Din unit. It holds the stereo securely in place and ensures it fits well in your car’s dashboard. This process requires careful handling and the right tools to avoid damage to the stereo or your car.
Follow each step closely to make sure the stereo fits properly and works smoothly.
Installing The Mounting Kit
First, check the mounting kit included with your stereo. It usually has brackets and screws needed for installation. Attach the brackets to the stereo using the screws provided. Make sure they are tight but do not over-tighten them.
Next, align the mounting kit with the car’s dashboard opening. The fit should be snug without forcing it. Use screws to secure the kit to the dashboard frame. This keeps the stereo stable during driving.
Fitting The Double Din Unit
Slide the Double Din unit into the mounting kit carefully. Push it in until it clicks or feels firmly seated. Do not push too hard; the stereo should fit smoothly.
Once the stereo is in place, test the buttons and screen. Check if the unit stays put without moving. If everything is secure, your stereo is ready for wiring and final setup.
Testing The System
Testing the system is a key step after installing your double din car stereo. It ensures everything works right. You can catch any issues early. This saves time and frustration later.
Powering On
Start by turning on the car’s ignition. The stereo should power up quickly. Look for the display screen to light up. If it stays dark, check the wiring connections. Confirm the fuse is not blown. The unit must turn on without delay.
Checking Audio And Features
Next, test the sound quality from the speakers. Play music or radio to check clarity. Adjust volume and balance settings. Make sure all speakers produce sound. Test features like Bluetooth, USB, and touchscreen. Each function should respond smoothly and without errors.

Final Assembly
The final assembly is the last step in installing your double din car stereo. This part ensures everything fits well and works perfectly. Take your time to make sure each piece is secure and looks neat. A clean finish helps your stereo last longer and perform better.
Reattaching The Trim
Start by placing the trim back around the stereo. Align it carefully with the dashboard edges. Press gently but firmly until the clips snap into place. Avoid forcing the trim to prevent damage. Check that the trim sits flush and looks even all around.
Reconnecting The Battery
Next, reconnect the car battery to restore power. Attach the positive terminal first, then the negative. Tighten the connections securely to avoid loose contact. Turn on the car and test the stereo’s functions. Listen for clear sound and check the display for errors.
Troubleshooting Tips
Troubleshooting is key after installing a double din car stereo. Some problems can stop the stereo from working right. Knowing common issues helps you fix them fast. You save time and avoid extra costs. This guide covers the main problems and easy fixes.
Common Installation Issues
One common issue is no power to the stereo. This can happen if wires are loose or not connected properly. Another problem is poor sound or no sound. This might be due to speaker wires not connected well. Sometimes, the stereo may not fit the dashboard correctly. This causes it to move or rattle while driving. A final issue is the stereo not turning on. This can be a blown fuse or a wiring error.
Quick Fixes
Check all wire connections. Make sure each wire is tight and in the right place. Replace blown fuses with new ones of the same size. Use a wiring diagram to match wires correctly. Test speakers by connecting them to another source. Secure the stereo with the correct mounting kit. Tighten all screws to stop rattling. Restart the car and the stereo to reset the system. These steps solve most problems fast and simply.
Frequently Asked Questions
What Tools Do I Need To Install A Double Din Stereo?
You need a screwdriver, wire stripper, electrical tape, and mounting kit. A panel removal tool helps avoid damage. Always disconnect the car battery before starting the installation for safety.
How Long Does Double Din Stereo Installation Take?
Installation usually takes 1 to 2 hours. Time varies based on your car model and wiring complexity. Following instructions carefully ensures a smooth and quick process.
Can I Keep Factory Features After Installing Double Din Stereo?
Yes, many double din stereos support factory features like steering controls. Use a compatible wiring harness adapter to retain these functions. Check your stereo’s specifications for compatibility.
How Do I Connect Wiring For Double Din Stereo?
Match the stereo wires to your car’s wiring harness using color codes. Use crimp connectors or solder wires for secure connections. Proper wiring ensures the stereo functions correctly.
Conclusion
Installing a double din car stereo can improve your driving experience. Follow each step carefully and take your time. Double-check all connections before powering the system on. This will help avoid common issues and ensure good sound quality. Enjoy your new stereo and the music it brings.
Keep your tools handy for future adjustments or upgrades. Remember, practice makes perfect with any car project. Happy driving!