If you want to protect yourself on the road and capture every important moment, mounting a dash cam is a smart move. But how do you do it right?
You might wonder where to place it, how to keep it steady, or how to avoid blocking your view while driving. This guide will walk you through simple, clear steps to mount your dash cam quickly and securely. By the end, you’ll have the confidence to set up your device perfectly, giving you peace of mind every time you get behind the wheel.
Keep reading to learn exactly how to mount a dash cam without hassle.
Choosing The Right Dash Cam
Choosing the right dash cam is important for clear video and easy use. The best dash cam fits your needs and your car. Some dash cams record front view only. Others also capture inside or rear views. Features like night vision and motion detection can help in different situations.
Think about where and how you will use the dash cam. A model with good video quality and easy controls will make your driving safer. Let’s explore key features and types of dash cams to guide your choice.
Key Features To Look For
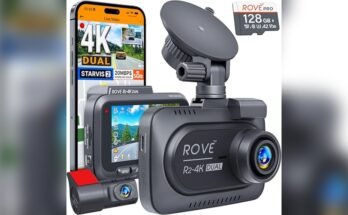
Video quality matters. Look for at least 1080p resolution for clear images. Night vision helps record in the dark. A wide-angle lens captures more of the road and sides. Built-in GPS tracks your speed and location. Motion detection starts recording if it senses movement. Loop recording saves space by overwriting old files. A screen or app lets you view videos easily. Choose a dash cam with a reliable power source for continuous use.
Types Of Dash Cams
Single-lens dash cams record the front view only. They are simple and affordable. Dual-lens dash cams record front and inside or rear views. Good for rideshare drivers or extra security. Mirror dash cams replace your rearview mirror with a camera. They offer a wide view and easy mounting. Wireless dash cams connect to your phone for quick access. Hardwired dash cams connect to the car’s power for constant use.

Preparing Your Vehicle
Preparing your vehicle is the first step before mounting a dash cam. A clean and well-chosen spot ensures the camera works properly. It also keeps your view clear and safe. Taking time to prepare makes installation easier and the footage better.
Selecting The Mounting Location
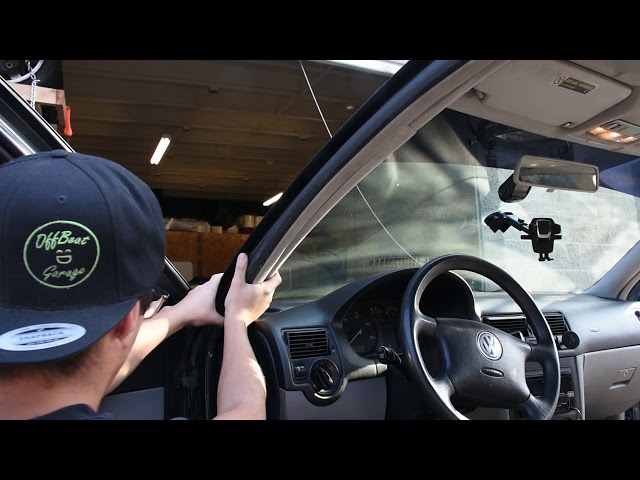
Choose a spot behind the rearview mirror. This area keeps the dash cam hidden and does not block your view. Make sure the camera can capture the road ahead clearly. Avoid placing it near air vents or sensors. These places might cause heat or signal issues. Check that the camera can connect to power easily.
Cleaning The Windshield
Clean the windshield where you will mount the camera. Use a glass cleaner and a soft cloth. Remove dust, dirt, and grease completely. A clean surface helps the mount stick firmly. Wipe the area dry before attaching the dash cam. This step prevents the camera from falling off while driving.
Mounting Options
Choosing the right mounting option for your dash cam is important. It affects how stable the camera stays and how clear your videos will be. Two common ways to mount a dash cam are suction cup mounts and adhesive mounts. Each has its own benefits and suits different needs.
Suction Cup Mount
Suction cup mounts stick to your windshield using a strong vacuum. They are easy to attach and remove. This makes them great for renters or people who want to move the dash cam between cars.
The suction cup mount allows you to adjust the angle quickly. It holds the dash cam steady during drives. Clean the windshield well before attaching to get the best hold.
One downside is that suction cups can lose grip in hot or cold weather. Check the mount regularly to avoid the camera falling off while driving.
Adhesive Mount
Adhesive mounts use a sticky pad to attach the dash cam. They provide a very strong hold and do not move easily. This makes them a good choice for permanent installation.
Once stuck, adhesive mounts are hard to remove. The pad may leave marks on your windshield. Place the camera carefully before pressing it down.
Adhesive mounts work well in all weather conditions. They keep the camera steady even on bumpy roads. Clean the area before applying to ensure it sticks well.
Step-by-step Installation
Installing a dash cam is simple when you follow clear steps. Proper installation ensures your camera records the best view. It also keeps the device secure while driving.
This guide breaks down the process into three main parts. Each part helps you set up your dash cam quickly and safely.
Attaching The Mount
Start by cleaning the windshield where you want to attach the mount. Use a cloth and some glass cleaner for a clear surface. Peel off the protective film from the adhesive base. Press the mount firmly against the windshield. Hold it for about 30 seconds to secure it well.
Securing The Dash Cam
Next, connect the dash cam to the mount. Slide or click it into place, depending on your model. Make sure it fits tightly and does not wobble. Check the user manual if you need help with the locking mechanism.
Adjusting The Camera Angle
Adjust the camera so it captures the road ahead clearly. Tilt and swivel the lens until you see the full view. Avoid pointing it too high or too low. A straight angle often records the best footage.
Wiring And Power Setup
Setting up the wiring and power for your dash cam is key to making it work well. The power source keeps the camera running while you drive. There are a few easy ways to do this, depending on your needs and skills. Choose the best method for your car and your dash cam model.
Using The Cigarette Lighter Adapter
This is the simplest way to power a dash cam. Plug the adapter into the cigarette lighter socket. The cable connects directly to the dash cam. It powers the camera only when the car is on. No changes to your car’s wiring are needed. This method is quick and easy for most drivers.
Hardwiring To The Fuse Box
Hardwiring offers a cleaner look and constant power. Connect the dash cam to the car’s fuse box. This allows the camera to work even when the car is off. Use a hardwire kit for safety and easy installation. It may need some basic tools and knowledge. This method keeps cables hidden and secure.
Cable Management Tips
Keep cables tidy and out of sight. Use clips or adhesive mounts along the windshield and dashboard edges. Avoid blocking air vents or controls. Tuck cables into trim panels for a neat finish. Proper cable management prevents damage and keeps your car safe.
Testing And Troubleshooting
Testing and troubleshooting your dash cam after mounting is important. It ensures the device works well and records clearly. A quick check can avoid future problems on the road. Here is how to test and fix common issues.
Checking Camera Operation
Turn on your dash cam and watch the screen. Make sure it powers up without errors. Check if it starts recording automatically. Look for clear video on the display. Listen for any unusual sounds from the device.
Play back a recorded video to confirm the image quality. Test the audio if your dash cam records sound. Verify the date and time are correct. These simple steps confirm your dash cam is working.
Adjusting Settings
Open the settings menu on your dash cam. Set the resolution for the best video quality. Adjust the date and time to your time zone. Turn on features like motion detection or parking mode if available.
Set loop recording length to fit your needs. Enable audio recording if you want sound. Adjust brightness or exposure to improve video clarity. Save changes before exiting the menu.
Common Issues And Fixes
The dash cam does not turn on. Check the power cable and connection. Replace the fuse if needed. The device does not record video. Format the memory card or try a new one. Make sure the card is compatible.
Video is blurry or dark. Clean the lens gently with a soft cloth. Adjust the camera angle for better view. The dash cam restarts often. Update the firmware or reset to factory settings. Contact support if problems persist.
Maintenance Tips
Maintaining your dash cam ensures it works well for a long time. Proper care helps you get clear videos and reliable performance. Follow these simple tips to keep your dash cam in top shape.
Cleaning The Lens
Dust and dirt can blur the camera lens. Use a soft, dry cloth to clean it gently. Avoid harsh chemicals that may damage the lens. Clean the lens regularly to keep video clear.
Updating Firmware
Firmware updates fix bugs and improve features. Check the manufacturer’s website for updates often. Connect your dash cam to a computer or use an app. Follow instructions carefully to update the firmware safely.
Storage And Memory Management
Memory cards fill up fast with video files. Delete old files or transfer them to a computer. Format the memory card regularly to avoid errors. Use high-quality memory cards for better performance and durability.
Frequently Asked Questions
Where Is The Best Place To Mount A Dash Cam?
The best place to mount a dash cam is behind the rearview mirror. This location offers a clear view without obstructing the driver’s vision. It also keeps the camera discreet and protects it from direct sunlight, ensuring optimal video quality and safety.
How Do You Mount A Dash Cam Without Damaging The Windshield?
Use the adhesive mount or suction cup provided with the dash cam. Clean the windshield surface thoroughly before attaching. Avoid using excessive force. This method secures the camera firmly without leaving marks or causing damage to the glass.
Can I Mount A Dash Cam On The Dashboard Instead?
Yes, you can mount a dash cam on the dashboard. However, it might record reflections or have a limited view. Dashboard mounts are less common but useful if windshield mounting is not possible or allowed by law.
How To Hide Dash Cam Wires Neatly In The Car?
Tuck wires into the headliner, A-pillar, and under the dashboard trim. Use cable clips or adhesive mounts to secure them. This method keeps wires organized, prevents distractions, and maintains the car’s interior aesthetics.
Conclusion
Mounting a dash cam is simple with the right steps. Place it where it records clearly without blocking your view. Secure the wires neatly to avoid distractions. Test the camera to ensure it works well. A well-mounted dash cam helps keep you safe on the road.
Take your time and follow the guide carefully. Drive with confidence, knowing your dash cam is ready to record.