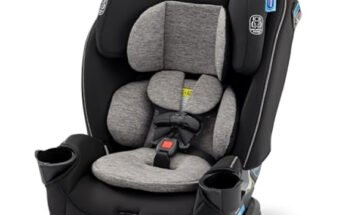
A correct car seat installation keeps your child secure by using the right seat, angle, belt path, and tether.
A car seat installation guide should do more than explain where the straps go. It should help you choose the right seat, understand your vehicle, avoid common mistakes, and check the fit with confidence. The steps below follow current U.S. safety guidance and practical lessons learned from helping families make car seats fit real vehicles, not just instruction diagrams.

49% off Today's Exclusive Deals
Limited-time Exclusive Deals. Check current discount on Amazon.
Check Price on Amazon As an Amazon Associate I earn from qualifying purchases.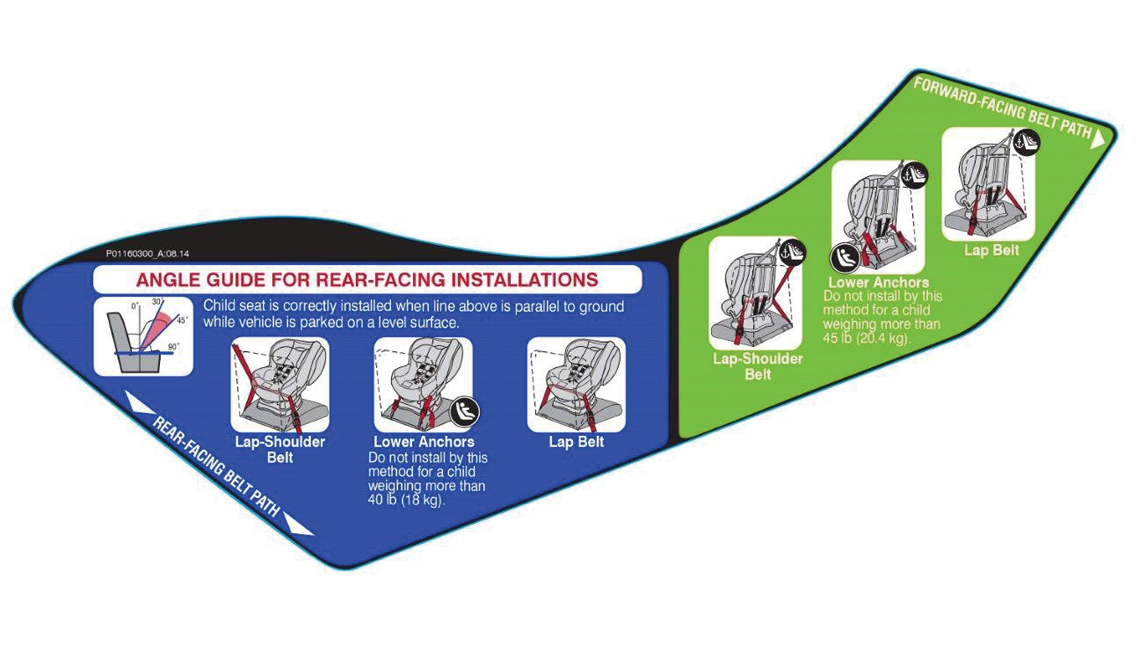
Source: safekids.org
Why Proper Car Seat Installation Matters
A car seat works as part of a complete safety system. The seat, vehicle belt or lower anchors, harness, headrest, and top tether must work together. If one part is loose or used in the wrong way, the seat may not protect your child as designed.
Many installation mistakes look small. A seat may move too much, the harness may sit too low, or the chest clip may rest near the stomach. During a crash, these small errors can become serious problems.
49% off Today's Exclusive Deals
Limited-time Exclusive Deals. Check current discount on Amazon.
Check Price on Amazon As an Amazon Associate I earn from qualifying purchases.A correct car seat installation should meet these basic goals:
• The seat matches your child’s age, height, weight, and development.
• The seat faces the correct direction.
• The seat is placed in an approved vehicle seating position.
49% off Today's Exclusive Deals
Limited-time Exclusive Deals. Check current discount on Amazon.
Check Price on Amazon As an Amazon Associate I earn from qualifying purchases.• The seat moves less than 1 inch from side to side or front to back when checked at the belt path.
• The harness fits snugly without slack.
• The top tether is used when required or recommended.
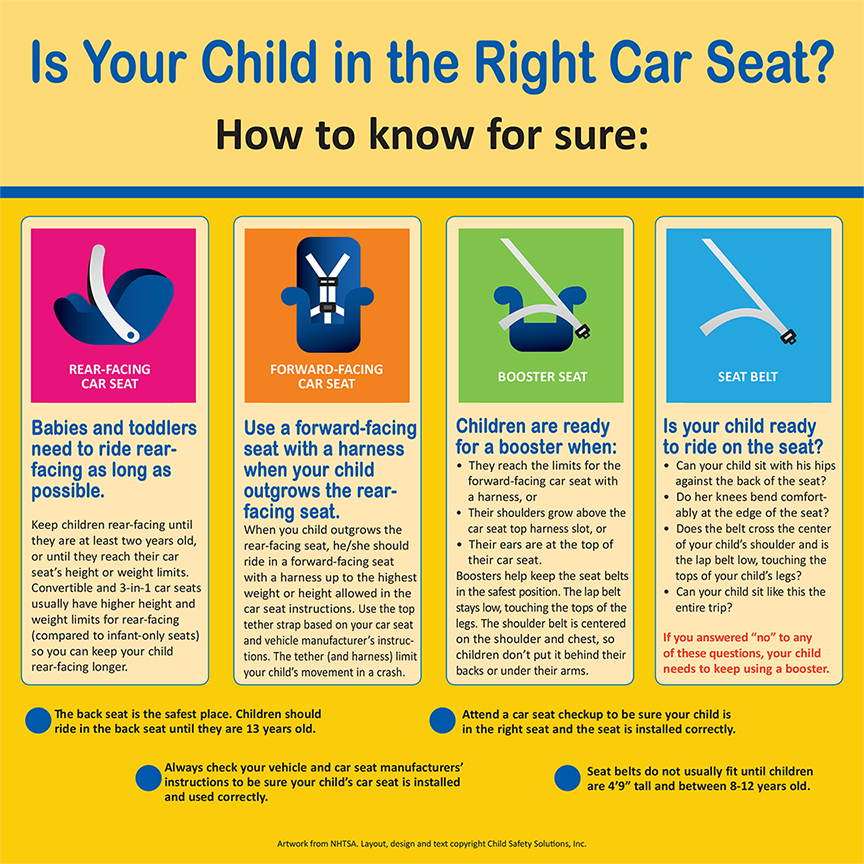
The American Academy of Pediatrics recommends that children ride rear facing as long as possible, within the limits of their seat. Children should then use a forward facing seat with a harness and tether before moving to a belt-positioning booster.
Source: coscokids.com
Choose the Right Car Seat First
A safe car seat installation starts before you open the box. Read the labels on the seat and check the limits in the manual. The right seat must fit both your child and your vehicle.
Rear-facing car seats
Rear-facing seats support a young child’s head, neck, and spine during a crash. Keep your child rear facing until the child reaches the highest height or weight limit set by the manufacturer.
Infant seats often have a detachable carrier and a base. Convertible seats can also face the rear and later turn forward. Always use the recline angle shown on the seat’s level indicator.
Forward-facing car seats
A forward-facing seat uses a built-in harness. It should also use the vehicle’s top tether whenever the vehicle and seat allow it. The tether limits forward movement of the child’s head in a crash.
Keep your child in a forward-facing harness seat until the child reaches the seat’s height or weight limit. Do not move to a booster only because your child’s legs look long or the child seems mature.
Booster seats
A booster seat raises the child so the vehicle lap and shoulder belt fit correctly. The lap belt should rest low across the upper thighs, not across the stomach. The shoulder belt should cross the center of the chest and shoulder.
A child is ready to stop using a booster when the vehicle belt fits correctly without it. This often happens between ages 8 and 12, but age alone does not decide readiness.
When choosing a seat, look for:
• A label showing compliance with Federal Motor Vehicle Safety Standard 213.
• Clear height and weight limits.
• A harness that is easy to adjust.
• A seat that fits your vehicle’s seating area.
• A manual that explains both seat belt and LATCH installation.
Source: sccfd.org
Read Both Manuals Before Installation
Your car seat manual explains the seat. Your vehicle owner’s manual explains the vehicle. You need both to complete a reliable car seat installation.
Look for the sections on:
• Approved seating positions.
• Lower anchors and tethers for children, also called LATCH.
• Seat belt locking methods.
• Air bags and child restraints.
• Center-seat installation.
• Top tether locations.
Do not assume that every vehicle position has lower anchors. In many vehicles, lower anchors are available only in the outer rear seats. A center position may require the vehicle seat belt instead.
One common mistake is using lower anchors and the seat belt together without approval. Some car seats allow both methods. Others do not. Follow the instructions for your exact seat and vehicle.
Your vehicle manual may also warn against placing a rear-facing seat in front of an active air bag. In general, children should ride in the back seat until at least age 13.

Source: youtube.com
Car Seat Installation Guide: Step-by-Step
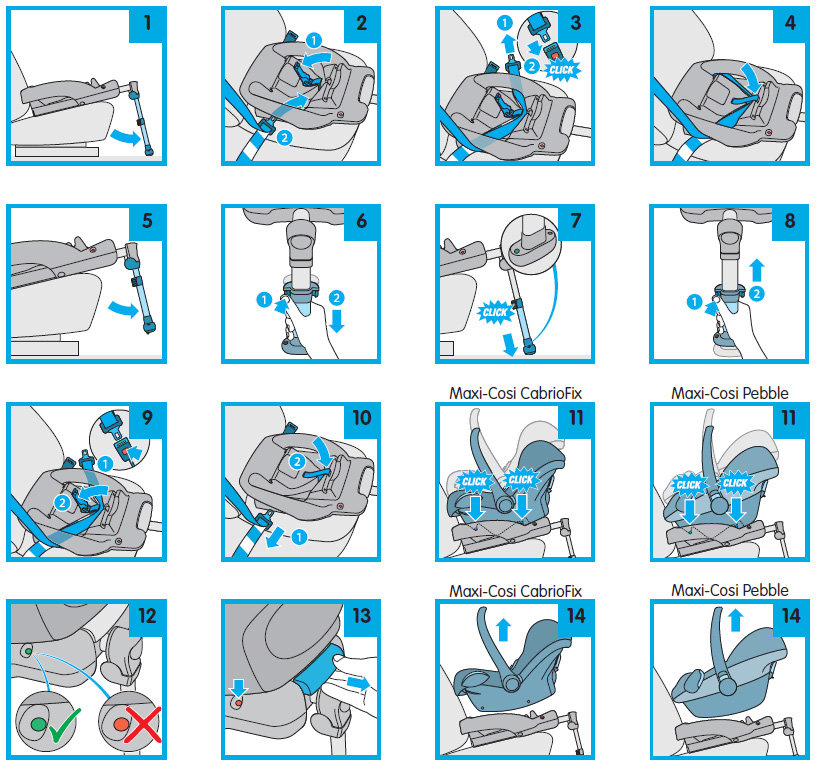
Use these steps as a practical car seat installation guide. The exact belt path and recline setting still depend on your seat’s manual.
1. Pick the safest available seating position
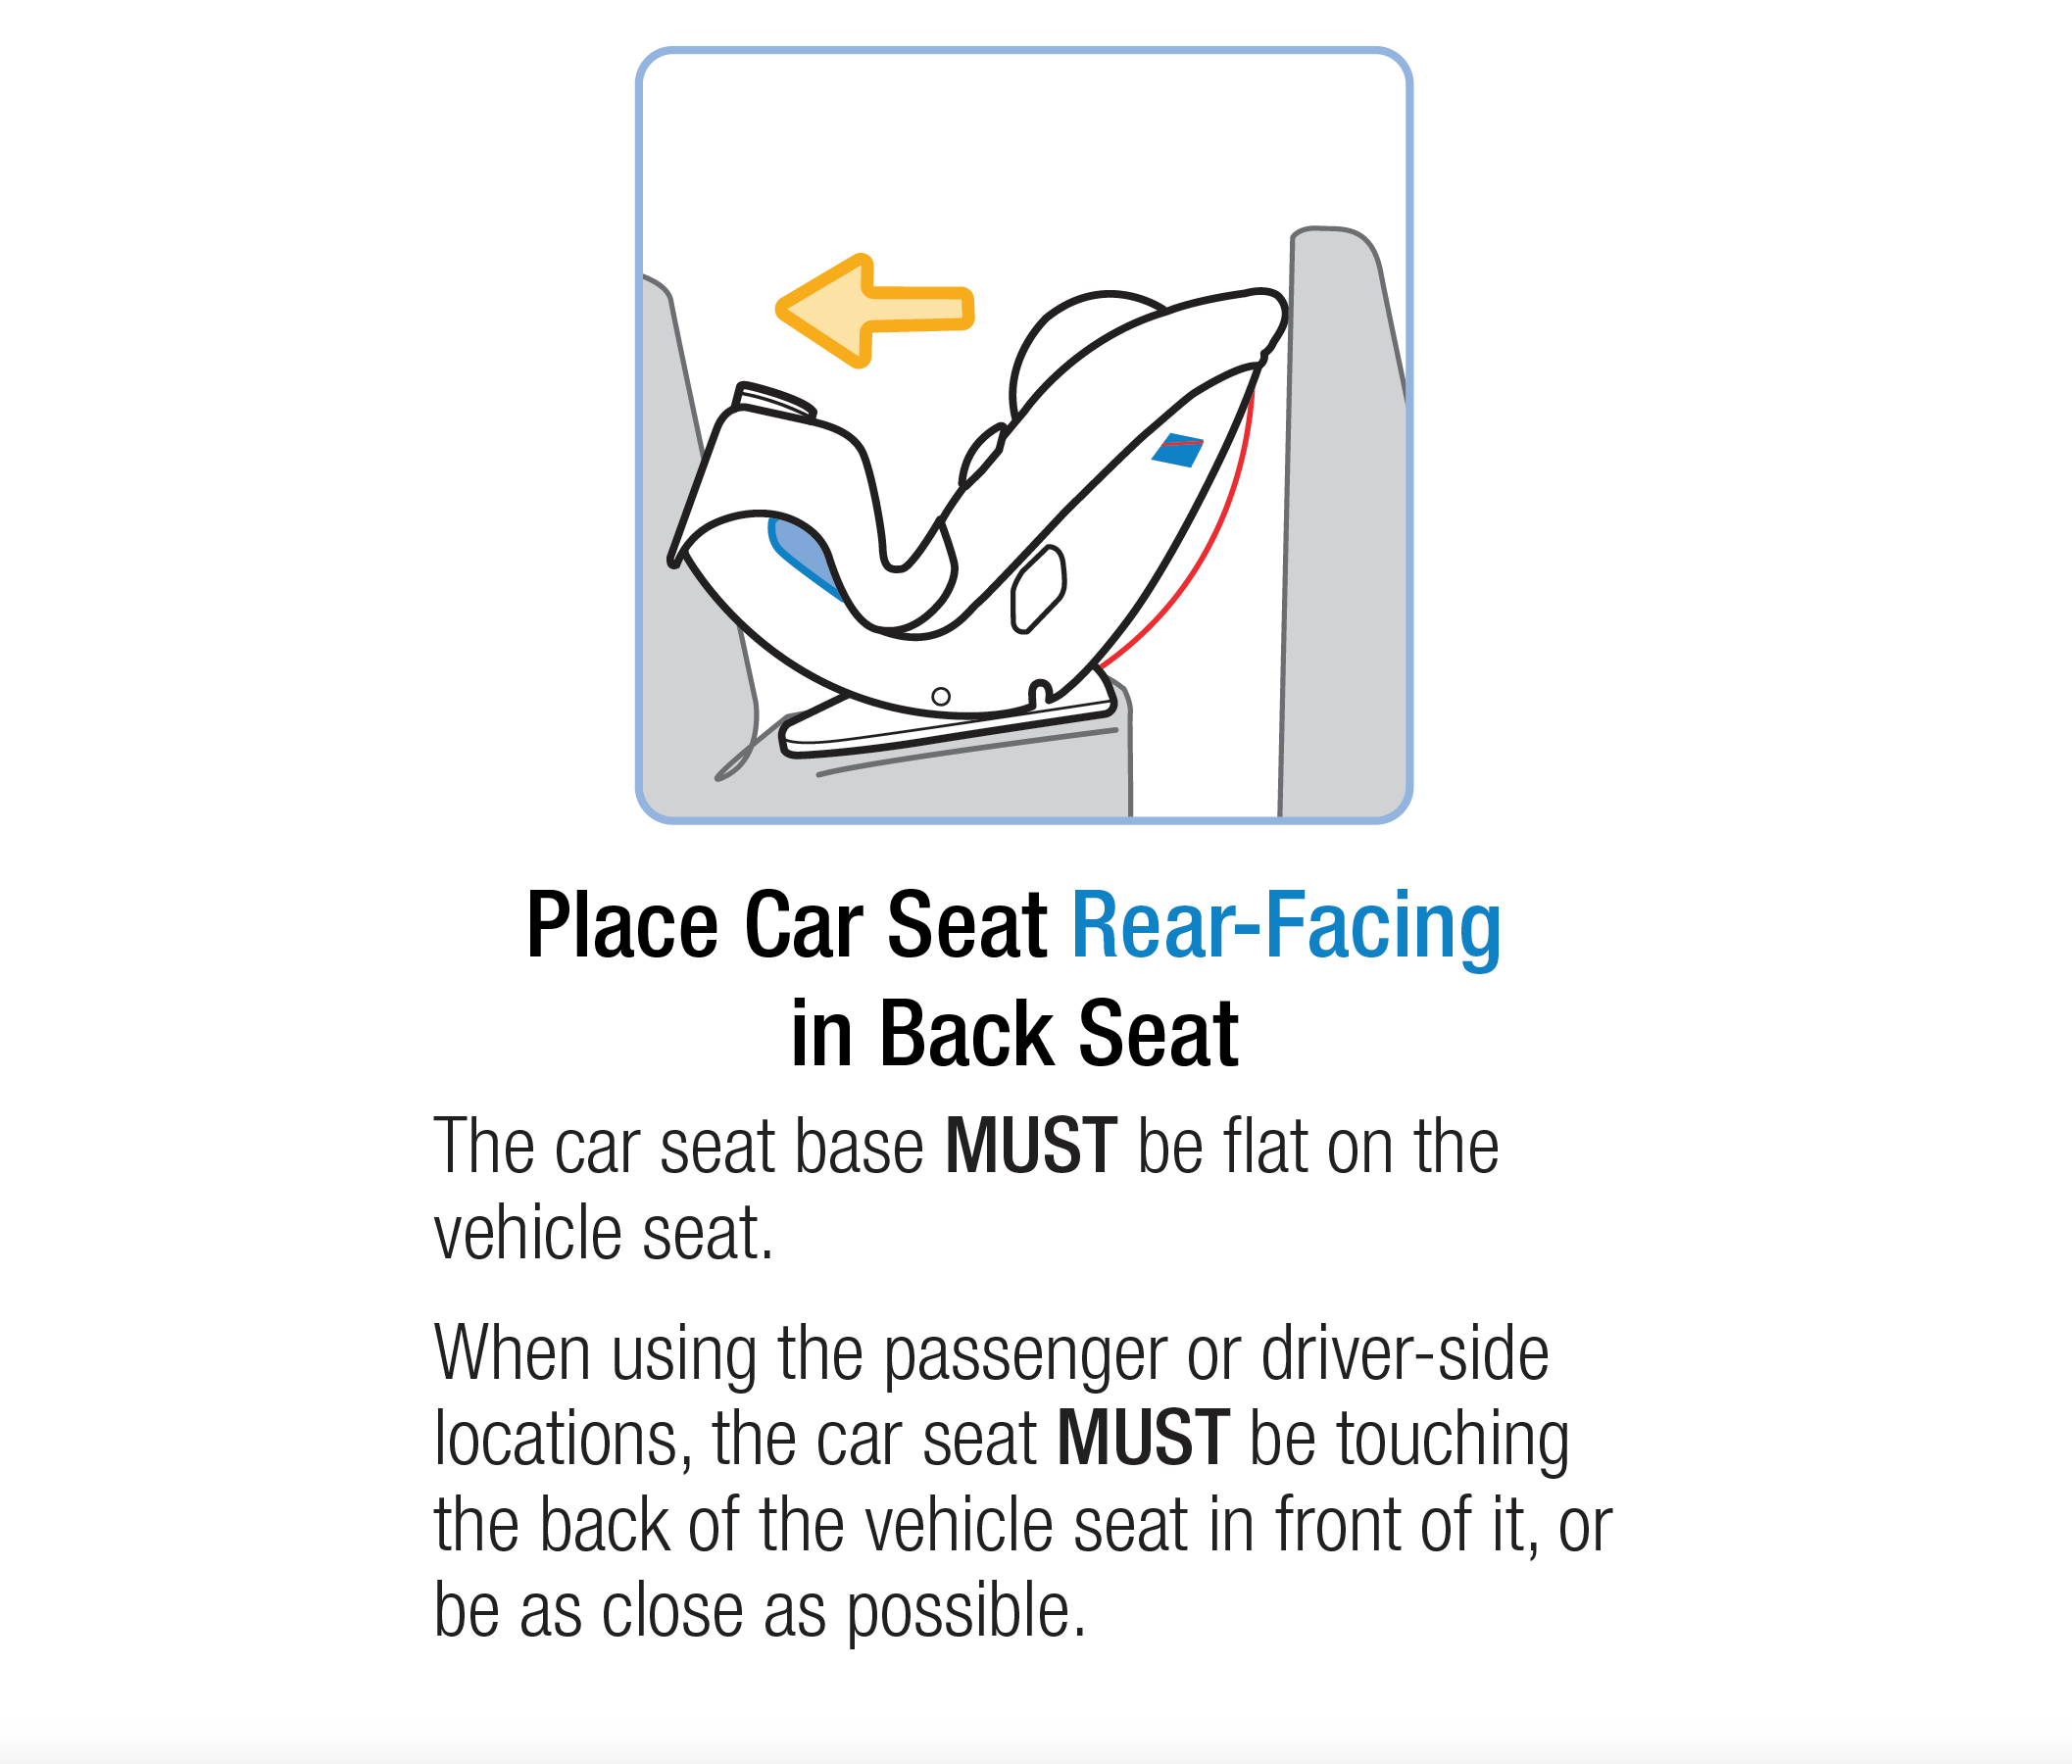
Use a rear seating position that gives the seat a firm, flat base. The center can be a good choice only if the car seat fits well and the vehicle manual allows installation there.
Do not place a car seat on a surface that is too narrow, sharply sloped, or blocked by another seat. Check that the front seats do not press against a rear-facing child seat unless the vehicle and car seat instructions permit it.
2. Set the correct recline angle
For a rear-facing seat, adjust the recline indicator before tightening the installation. A young baby needs enough recline to keep the airway open. An incorrect angle can make the baby’s head fall forward.
For a forward-facing seat, use the recline position listed in the manual. Do not add towels, pool noodles, cushions, or other items unless the manufacturer specifically permits them.
3. Route the belt or lower anchors correctly
Choose one approved installation method. Route the vehicle belt or lower anchor strap through the belt path marked for the direction of travel.
Do not route the belt through the wrong opening. This is one of the most common car seat installation errors because the correct path can look different for rear-facing and forward-facing use.
Remove twists from the belt or anchor strap. Keep the buckle outside the belt path unless the manual shows otherwise.
4. Tighten the installation
Press down firmly on the car seat near the belt path. Pull the vehicle belt or lower anchor strap tight. You may need to feed the belt back through the retractor in small steps.
After tightening, test the seat at the belt path. It should move less than 1 inch from side to side and front to back. Do not test it by pulling on the top of the seat, because the top may move even when the base is secure.
5. Attach the top tether for forward-facing use
Find the tether anchor in the vehicle. It may be on the rear shelf, cargo area, seatback, floor, ceiling, or behind a small cover.
Connect the tether hook to the correct anchor. Tighten the strap until it is snug. Never attach the tether to a cargo hook unless the vehicle manual identifies that hook as a tether anchor.
The top tether is not a substitute for the lower anchors or seat belt. It works with the main installation method.
6. Adjust the harness
Place the child’s back flat against the seat. The child’s bottom should rest deep in the seat, with no bulky clothing under the harness.
For rear-facing use, the harness straps should come from at or below the child’s shoulders. For forward-facing use, the straps should come from at or above the shoulders, based on the seat manual.
Pinch the harness webbing near the shoulder. If you can pinch extra material, tighten it. The chest clip should sit at armpit level.
7. Complete a final check
Ask yourself:
• Is the seat facing the correct direction?
• Is the recline angle correct?
• Is the seat tight at the belt path?
• Is the harness free of twists?
• Is the chest clip at armpit level?
• Is the top tether connected for forward-facing use?
• Are there no thick coats, inserts, or accessories that the manual does not approve?
This final check takes less than a minute. It can prevent a rushed mistake before every trip.
Source: medonemedicalgroup.com
Seat Belt Installation vs. LATCH
LATCH can make installation easier, but it is not automatically safer than a seat belt. A properly installed seat belt can hold a car seat securely when used according to the manual.
LATCH includes lower anchors and a top tether. Lower anchors connect the car seat to anchors in the vehicle. The top tether connects the upper part of a forward-facing seat to a tether anchor.
Pay attention to the combined weight limit for lower anchors. Many seats and vehicles limit lower-anchor use when the child and seat reach a certain combined weight. The labels and manuals provide the correct limit.
Use the vehicle seat belt when:
• The lower anchors are not available in that seating position.
• The child’s weight exceeds the lower-anchor limit.
• The seat belt creates a better fit.
• The car seat manual requires it.
A seat belt must be locked for car seat installation. Depending on the vehicle, this may happen through a switchable retractor, a locking latch plate, or an approved built-in lock-off on the car seat.
If the belt slips after you tighten it, stop and read the vehicle manual. Do not rely on a loose belt or a belt clip unless the car seat manufacturer specifically allows that device.
Source: youtube.com
Common Car Seat Installation Mistakes
Even careful parents can make mistakes. The best approach is to check the installation without shame. Safety checks are about learning, not blame.
The seat moves too much
A seat that moves more than 1 inch at the belt path is not tight enough. Remove the belt or anchors, reset the seat, and tighten again while pressing near the belt path.
The harness is too loose
The harness should hold the child firmly against the seat. Thick coats can create hidden slack. Use thin clothing and place a blanket over the harness after it is buckled.
The chest clip is too low
The chest clip belongs at armpit level. It helps keep the shoulder straps in the right position. It is not meant to rest on the child’s belly or neck.
The seat is installed with the wrong belt path
Read the labels on the car seat. Rear-facing and forward-facing belt paths are often different. Using the wrong one can weaken the installation.
The tether is ignored
The top tether matters for forward-facing seats. Use it every time the instructions require it and make sure it connects to the real tether anchor.
Extra products are added
Head supports, seat protectors, harness pads, toys, and aftermarket covers can change how the restraint works. Use only products that came with the seat or are approved by its manufacturer.
The seat is expired or damaged
Car seats have expiration dates because materials can weaken and safety standards can change. Replace a seat after a moderate or severe crash unless the manufacturer clearly says it remains safe to use.
Source: designcovers.com
How to Check Your Installation
A hands-on inspection by a certified child passenger safety technician can give you valuable peace of mind. Technicians can often find small issues that are hard to notice at home, such as a poor recline angle or an incorrect buckle position.
You can search for a certified inspection location through local hospitals, fire departments, police departments, health agencies, or child passenger safety programs. Availability varies by area, and some locations require an appointment.
Before visiting, bring:
• The car seat.
• The vehicle.
• The car seat manual.
• The vehicle owner’s manual.
• Your child, if the service includes a harness fit check.
Do not rely only on a quick look from a friend or family member. A car seat may appear secure while using the wrong belt path or an unapproved anchor.
A useful habit is to repeat the installation check after moving the seat, cleaning it, changing vehicles, or adjusting the seat for a growing child.

Source: youtube.com
Car Seat Safety in Different Situations
Installing a car seat in a rental car
Read the rental vehicle manual when possible. Check for lower anchors, tether anchors, and seat belt locking features before you begin.
If you cannot create a tight installation, ask for another vehicle. A different model may have a flatter seat or clearer anchor locations.
Using a car seat in a taxi or rideshare
Rules vary by state and service. In many cases, the adult must bring and install the child restraint. A portable seat may be easier for frequent rides, but it still needs a correct installation.
Plan extra time. A rushed car seat installation in a busy pickup area is more likely to go wrong.
Traveling by airplane
Most harnessed car seats certified for use in motor vehicles are allowed on aircraft, but the seat must fit the airplane seat and display the required approval label. Check the airline’s current policy before flying.
Do not use a booster seat on an airplane because airplane lap belts do not provide the same shoulder belt fit as a vehicle belt.
Using a secondhand seat
A used seat may be safe only when you know its history. Confirm that it has no crash history, no missing parts, no recalls, and no damage. Check the expiration date and make sure the manual is available.
If you cannot verify these details, choose a new seat. Saving money is not worth guessing about a seat’s past.
A Simple Weekly Safety Check
A quick weekly check can keep your car seat installation working as your child grows.
Follow this routine:
- Push the seat at the belt path and check for less than 1 inch of movement.
- Look for twists in the harness, lower anchor strap, and vehicle belt.
- Confirm the recline angle.
- Buckle the harness and perform the pinch test.
- Check that the chest clip sits at armpit level.
- Confirm that the tether remains attached for a forward-facing seat.
- Look for recalls, broken parts, or expired materials.
Children grow quickly. A harness that fit well last month may need adjustment today. Keep the harness snug and follow the seat’s height and weight limits rather than guessing based on age.
Frequently Asked Questions About Car Seat Installation
How tight should a car seat be?
A properly installed car seat should move less than 1 inch from side to side or front to back when you test it at the belt path. Movement at the top of the seat is normal and is not the correct place to check.
Is LATCH safer than a seat belt?
Neither method is automatically safer when used correctly. Choose the method that creates a tight, approved installation for your specific car seat and vehicle.
Should a rear-facing car seat use the top tether?
Most rear-facing seats do not use a top tether in the United States, but some manufacturers allow or require it. Follow the car seat manual and never attach a tether to an unapproved vehicle location.
Can I use a car seat with a winter coat?
Bulky coats can create hidden space under the harness. Use thin layers, tighten the harness against the child, and place a blanket over the buckled harness for warmth.
When should a child turn forward facing?
Keep a child rear facing until the child reaches the highest height or weight limit allowed by the car seat. This may be longer than the child’s second birthday, so follow the seat limits instead of using a fixed age alone.
Can I install a car seat in the front seat?
The back seat is generally safer for children. Never place a rear-facing seat in front of an active passenger air bag, and follow the vehicle and car seat manuals for every seating position.
Do all car seats fit all vehicles?
No. Seat shapes, belt buckles, anchor locations, and headrests vary. Test the car seat in your vehicle before relying on it, especially if you are buying a large convertible or all-in-one seat.
Conclusion
A safe car seat installation depends on several simple but important details: choose the right seat, read both manuals, use the correct belt path, set the right recline angle, tighten the seat at the belt path, and secure the harness correctly. For forward-facing seats, use the top tether as directed.
Take your time and check the installation often. If anything feels unclear, contact a certified child passenger safety technician instead of guessing. Use this car seat installation guide as a starting point, review your manuals, and share your questions or experiences in the comments.