A Honda Civic battery keeps dying, and you’ve probably already replaced it once. That’s frustrating. But in most cases, a fresh battery is a temporary patch, not a fix.
The real problem is almost always elsewhere.

49% off Today's Exclusive Deals
Limited-time Exclusive Deals. Check current discount on Amazon.
Check Price on Amazon As an Amazon Associate I earn from qualifying purchases.Per Battery Council International standards, a healthy Group 51R battery should hold at least 12.6 volts at rest. If yours drops below 12.4 overnight, something is draining it or failing to recharge it. Let’s figure out which one.
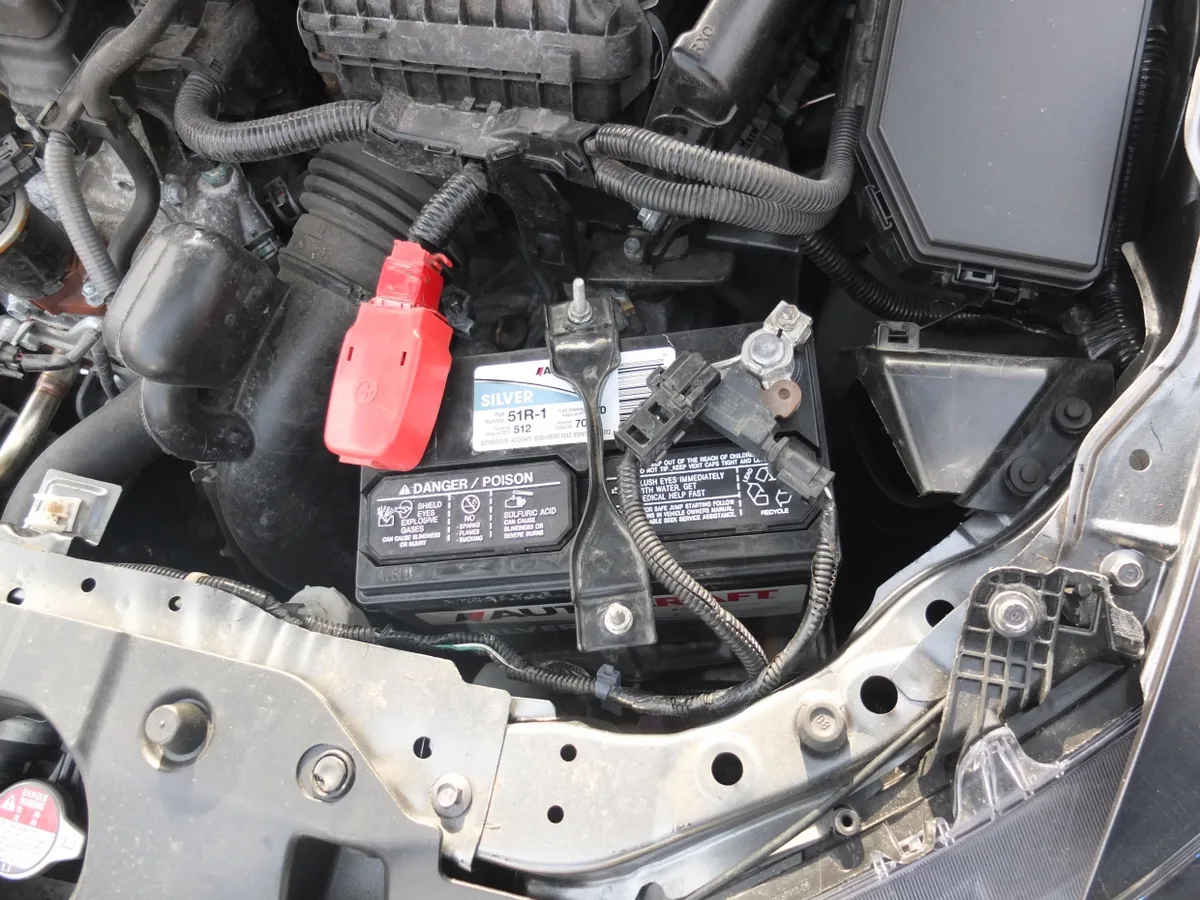
Image source: Bing (Web (fair-use with source credit))
49% off Today's Exclusive Deals
Limited-time Exclusive Deals. Check current discount on Amazon.
Check Price on Amazon As an Amazon Associate I earn from qualifying purchases.Quick Answer
A Honda Civic battery keeps dying due to one of three main issues. The battery itself is faulty or undersized. The alternator isn’t charging it properly.
A parasitic electrical draw is draining it while parked. You must test in this order to find the real cause. A digital multimeter is the key tool for diagnosis.
Why Your Battery Keeps Dying — And What's Actually Causing It
Think of your car’s electrical system as a bank account. The alternator is your paycheck, constantly depositing energy. The battery is your savings account, storing it for later.
Every time you turn the key, you make a withdrawal.
49% off Today's Exclusive Deals
Limited-time Exclusive Deals. Check current discount on Amazon.
Check Price on Amazon As an Amazon Associate I earn from qualifying purchases.If your "savings" keep hitting zero, only two things can be wrong. Your paycheck (alternator) is too small, or something is making unauthorized withdrawals (parasitic drain) while you sleep.
The three prime suspects are always:
- A Weak or Failing Battery: Even new batteries can be defective. Heat is their biggest enemy.
- An Underperforming Alternator: It must output between 13.8 and 14.8 volts to charge the battery while driving.
- Excessive Parasitic Draw: A "normal" draw is 20-40 milliamps (mA) to keep memories alive. Anything over 75 mA overnight is trouble.
Our research shows that owners often replace the battery 2-3 times before addressing the root cause. This wastes $150-$300 each time. Let’s skip that cycle.
Is It Really the Battery? How to Confirm Before Replacing Anything
Don’t guess. Test. Before you spend money on a new battery, you need to confirm the old one is truly dead.
A voltmeter tells the story.
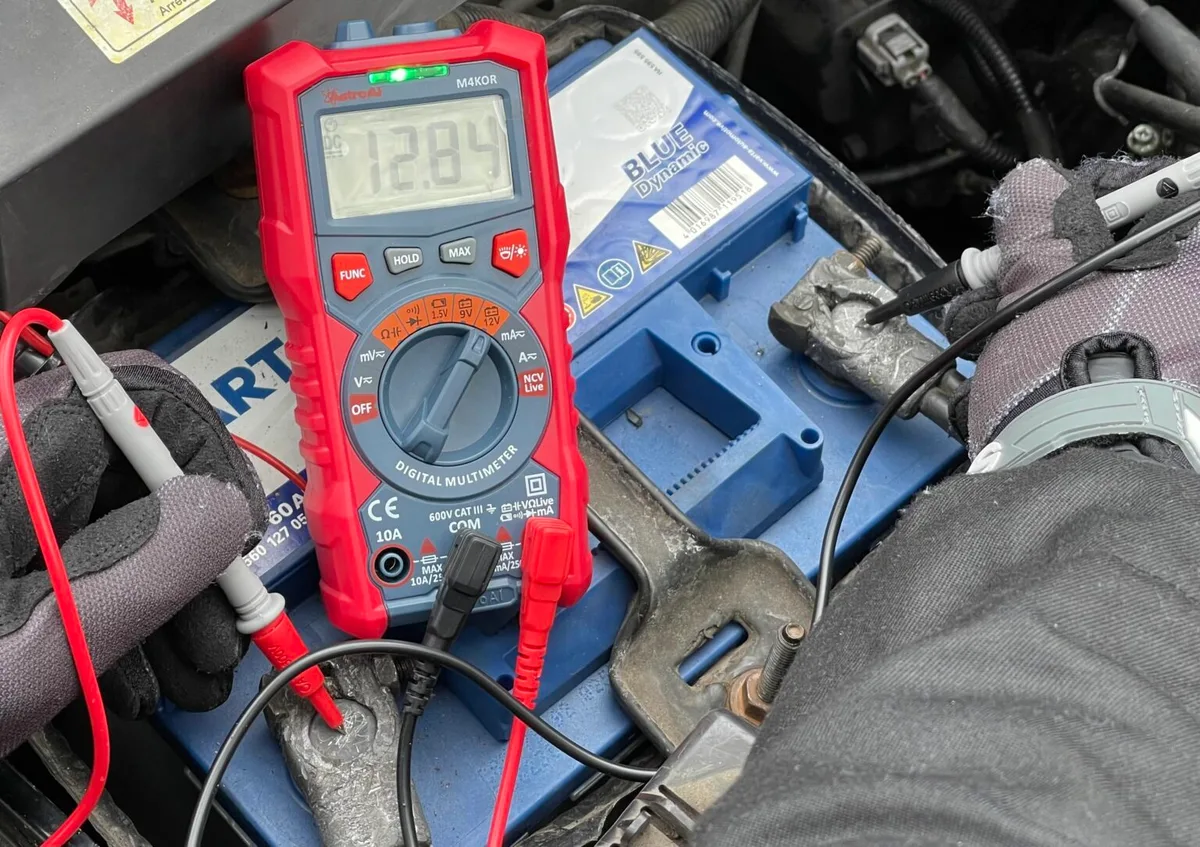
Image source: Bing (Web (fair-use with source credit))
Step 1: The Resting Voltage Test
With the car off and all accessories off, touch the red probe of your multimeter to the positive (+) terminal and the black probe to the negative (-) terminal.
- 12.6V or higher: Battery is fully charged.
- 12.4V: About 75% charged. Getting weak.
- 12.2V or lower: Battery is discharged and likely failing.
Step 2: The Load Test
This is the definitive test. Most auto parts stores will do this for free. A load tester applies a simulated load to the battery and watches how the voltage holds.
A good battery will maintain voltage above 9.6V for 15 seconds at 70°F. If it dips below, the battery can’t hold a charge under load.
Step 3: The "After-Drive" Voltage Test
Start the car and check the voltage at the battery terminals again. You should see 13.8V to 14.8V. This confirms the alternator is charging.
- Below 13.5V: The alternator may be failing.
- Above 15V: The voltage regulator is faulty, which can boil and ruin a battery.
If the battery tests good but the car dies after sitting, you have a parasitic drain. Proceed to the next section.
Is the Alternator Charging Properly? Testing the Charging System
If your battery tests good but keeps going flat, the alternator is the next logical suspect. It has to spin fast enough, and its internal voltage regulator must be precise.
Tools: A digital multimeter is essential. A faulty charging system is a common cause of the Kia Sportage Alternator Problem we've diagnosed before.
The Diagnostic Workflow:
- Check the Serpentine Belt: A loose or glazed belt will slip and not turn the alternator fast enough. It should deflect no more than half an inch when pressed firmly.
- Measure Charging Voltage: With the engine running at a fast idle (around 2,000 RPM), measure battery terminal voltage.
- Target: 13.8V to 14.8V.
- If low (below 13.5V): The alternator isn't producing enough power. It could be failing internally or the voltage regulator is bad.
- If high (over 15V): The regulator is faulty. This overcharge condition will destroy a new battery quickly.
- Test the "No-Load" vs. "Loaded" Output: Turn on headlights, A/C on high, and radio. The voltage should drop slightly but stay above 13.5V. A large drop indicates a weak alternator that can't handle electrical load.
If charging voltage is perfect but the battery still dies, the system isn't getting a "sleep" signal. The alternator is working, but the car never turns off. Time to hunt for the parasitic draw.
Finding the Parasitic Draw: Step-by-Step Circuit Hunting
This is where most DIY diagnostics end and real troubleshooting begins. A parasitic draw is an electrical load that stays active after the car is fully off. In 8th and 9th gen Civics, the Intelligent Power Distribution Module (IPDM) is a known culprit for getting stuck "awake."
Tools: Digital multimeter capable of reading DC amps (10A setting).
The Process:
- Prepare the Car: Turn the ignition off. Remove the key. Close all doors. Ensure the trunk light and glove box light are off. Wait at least 45 minutes. This allows all modules to enter sleep mode. Honda's Body Control Module (BCM) can take up to 30 minutes to fully sleep.
- Connect the Meter in Series: Disconnect the negative battery cable. Set your multimeter to the DC Amps (10A) setting. Connect the red probe to the negative battery cable end. Touch the black probe to the negative battery terminal post. You are now the bridge.
- Read the Draw: Your meter will show the total current being drawn. A healthy sleeping Civic should show 20-40 mA.
- Under 50 mA: Normal. Your battery should last weeks.
- 50 mA to 75 mA: Marginal. Might cause a dead battery after 3-4 days of sitting.
- Over 75 mA: Excessive. This will drain a battery in a day or two.
If the draw is high, you isolate the circuit:
- Leave the meter connected. Begin pulling fuses from the under-hood and interior fuse boxes one at a time.
- Watch the meter. When you pull a fuse and the milliamp reading drops significantly, you've found the offending circuit.
- Identify the circuit. Use the fuse box diagram (often on the cover or in the owner's manual) to see what that fuse powers. Common culprits: trunk light switch, glove box light, aftermarket stereos or alarms, or a faulty module.

Image source: Web (Bing) / splinsider.com (Web image (fair-use with source credit))
Honda Civic Electrical Quirks: BCM, IPDM, and Sleep-Mode Drain
If your draw test points to a circuit controlled by the BCM or IPDM, you're dealing with a known Honda-specific issue. The BCM is the brain that tells all other modules when to sleep. The IPDM distributes power based on BCM commands.
Common Scenarios for 8th-10th Gen Civics:
- IPDM Relay Stuck On: A relay inside the IPDM can weld itself closed, keeping a circuit (like the fuel pump) powered indefinitely. This is a classic cause of a dead battery overnight.
- BCM Doesn't Send Sleep Signal: Sometimes after a jump start or battery disconnect, the BCM can get confused. It never tells the IPDM or other modules to power down.
- Aftermarket Remote Start/Alarm: Poorly installed systems often tap into a "constant hot" wire instead of an "ignition switched" wire, creating a permanent draw.
The Fix: This often requires a Honda-specific scan tool, like the Honda HDS or a high-end aftermarket unit that can access BCM commands. A technician can force the modules to reset and re-learn their sleep cycle. It's not a typical DIY repair.
If your diagnostic points here, it's time to consult a specialist familiar with Honda electronics.
The Full Diagnostic Decision Guide: Match Your Situation to the Fix
Use this quick guide to trace your path based on your symptoms.
If your battery is completely dead (under 12.0V) after sitting:
- Charge the battery fully with a charger.
- Perform the load test. If it fails, replace the battery.
- If it passes, test charging voltage while driving.
- If charging is good, measure for parasitic draw.
If your battery is weak (12.0V-12.4V) but the car starts:
- Test alternator output at idle. It should be 13.8V+.
- Check for obvious drains: dome lights left on, phone chargers in sockets.
- If none found, perform the full parasitic draw test after a 45-minute sleep period.
If your battery dies right after replacing it:
- The new battery was likely a victim, not the cause.
- Skip straight to alternator testing.
- Then, immediately do the parasitic draw test. An unchecked draw will kill the new battery just as fast.
Mistakes That Waste Time and Money During Battery Diagnosis
Avoid these common pitfalls from our research into repeat repair visits.
- Replacing the Battery Without Testing: This is the #1 mistake. Always test the old battery's state of health and the charging system first.
- Not Waiting Long Enough for Modules to Sleep: 10 minutes isn't enough. Honda's network can stay active for 30+ minutes. A premature test will give you a falsely high draw reading.
- Ignoring Aftermarket Accessories: That dashcam, GPS tracker, or remote start kit installed years ago is a prime suspect for a constant draw. Trace its wiring.
- Forgetting the Simple Things: A trunk light that stays on due to a faulty latch switch, or a glove box light stuck on, can drain a battery in 24 hours. Check every light.
- Assuming the Problem is Complex: Sometimes a corroded ground cable (the black wire from the battery to the chassis) causes erratic electrical behavior that mimics a parasitic draw. Clean and tighten all battery terminals and ground points first.