Your Subaru Outback radiator problem usually announces itself with one of two symptoms: an overheating gauge or a puddle of coolant under the front bumper. Most Outback owners aren't just wondering what's wrong. They're also trying to figure out whether this is a simple swap or the start of something far more expensive.
This guide walks you through the diagnosis so you don't waste money on the wrong fix.

49% off Today's Exclusive Deals
Limited-time Exclusive Deals. Check current discount on Amazon.
Check Price on Amazon As an Amazon Associate I earn from qualifying purchases.Manufacturer specifications indicate that the factory radiator's plastic end tanks are the weakest link. Aggregate repair data shows most of them crack after roughly 8 to 12 years or about 100,000 miles. That gives you a useful starting point.
Here's what to look for first.
49% off Today's Exclusive Deals
Limited-time Exclusive Deals. Check current discount on Amazon.
Check Price on Amazon As an Amazon Associate I earn from qualifying purchases.Image source: Bing (Web (fair-use with source credit))
Quick Answer
A Subaru Outback radiator problem usually traces to a cracked plastic tank or a stuck fan. Check the overflow tank for bubbles. Look for dried coolant deposits.
Replace the radiator before the engine overheats badly. Head gaskets fail differently.
Is It the Radiator or the Head Gasket? Start With These Symptoms
A coolant puddle tells you the radiator is leaking. Bubbling in the overflow tank after shutdown tells you something else entirely. The Outback's boxer engine has a documented history of head gasket failure, so you need to separate a simple radiator swap from an engine-level problem before you spend money.
49% off Today's Exclusive Deals
Limited-time Exclusive Deals. Check current discount on Amazon.
Check Price on Amazon As an Amazon Associate I earn from qualifying purchases.What a Radiator Leak Looks Like
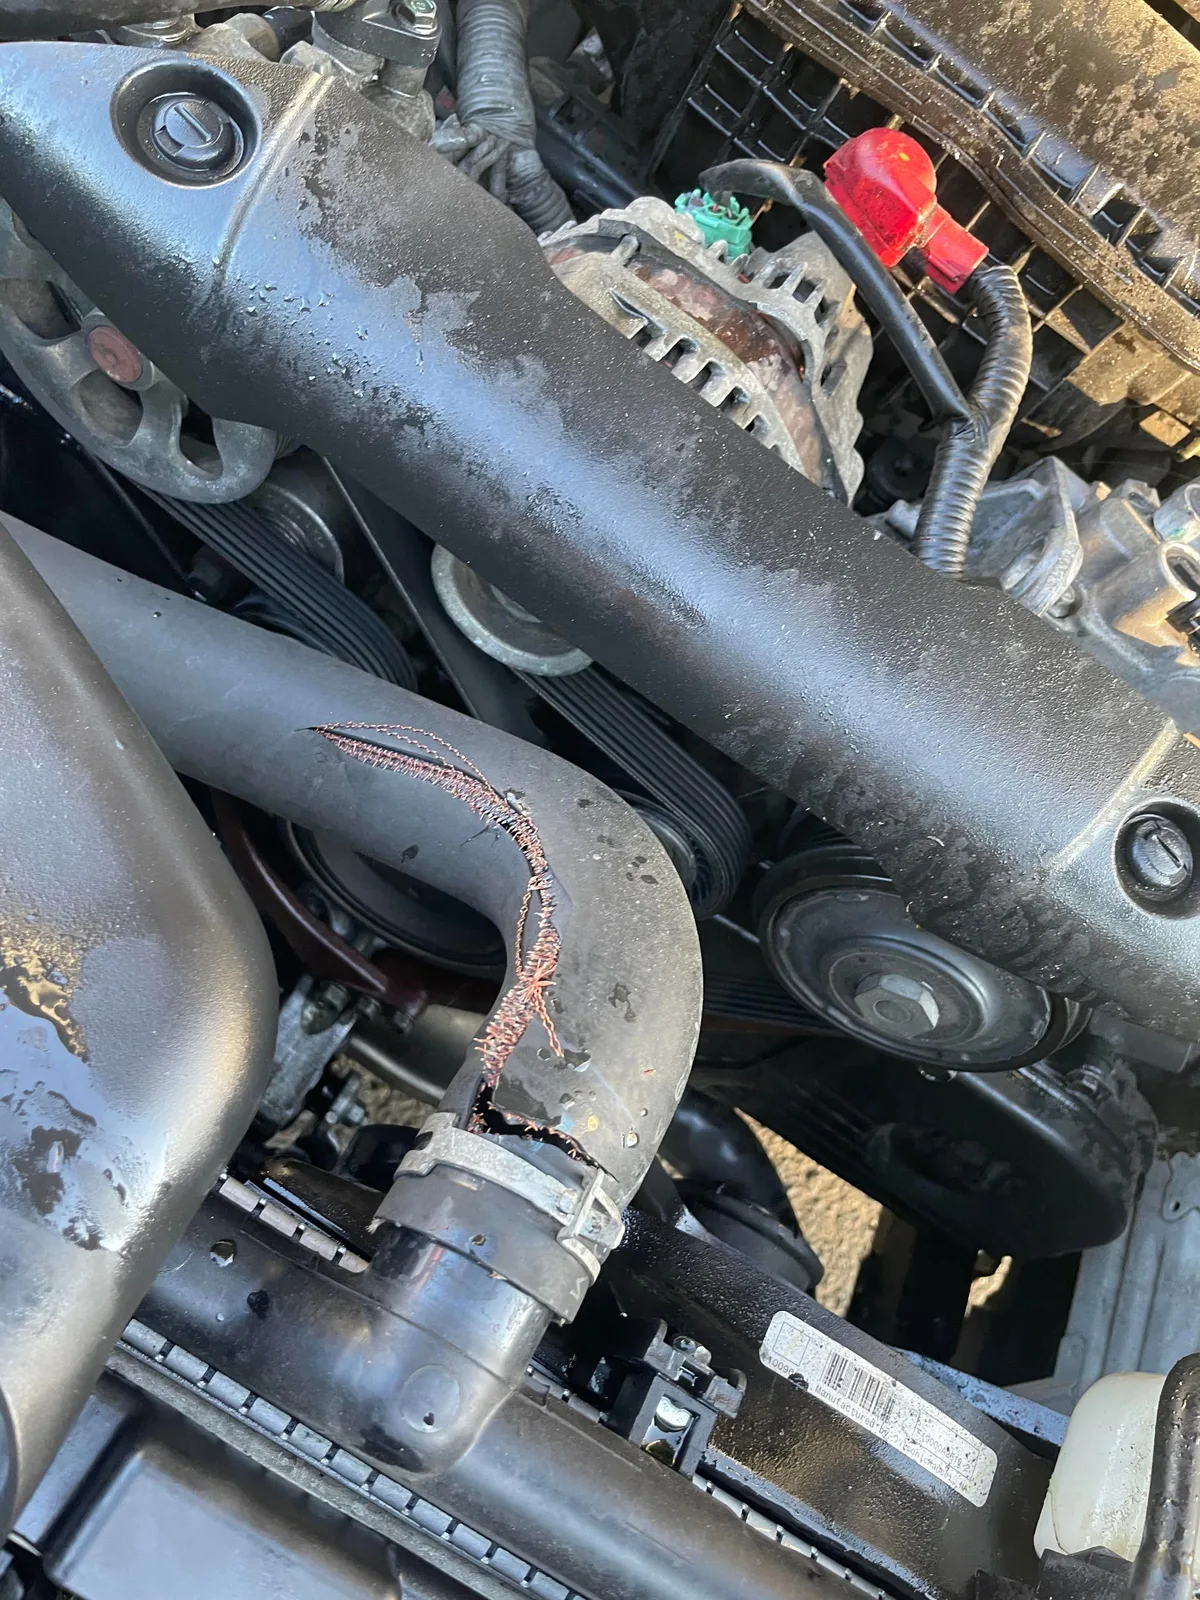
Look for crusty, dried coolant on the plastic end tank, the hose connections, or the seam where the tank meets the metal core. On the Outback, the upper radiator hose fitting is the classic crack point. If you find residue anywhere along that path, the radiator is the first suspect.
One quick confirmation: the radiator cap should hold the system's design pressure of roughly 16 psi. A weak cap will push coolant into the overflow tank even when the radiator itself is fine.
What Points to the Head Gasket Instead
Milky brown oil on the dipstick is the big red flag. Oily film floating in the coolant reservoir or white smoke from the tailpipe are the second and third signs. If you see any of those, stop and run a combustion leak test before touching the radiator.
The test block's blue fluid turns yellow or green if exhaust gas is entering the cooling system. That's a head gasket fix, not a radiator fix. If you're chasing a coolant leak under the car, this guide to tracking down a coolant leak helps you confirm the source before you buy parts.
Quick Symptom Comparison
| Symptom | Radiator Problem | Head Gasket Problem |
|---|---|---|
| Coolant puddle under the front | Common | Rare |
| Overheating only in traffic | Possible | Possible |
| Milky brown oil on dipstick | No | Yes |
| Bubbling in overflow tank | Sometimes | Yes |
| White smoke from tailpipe | No | Yes |
What to Do First
Check the coolant level when the engine is cold. If the reservoir is empty, you already know you're losing coolant somewhere. Then follow the residue trail.
If the signs point to the radiator itself, the next section covers the three failure modes you'll actually encounter.
The Most Common Subaru Outback Radiator Failures: Plastic Tanks, Clogged Core, and Fan Issues
Three distinct failures account for nearly all Outback radiator problems. Knowing which one you're dealing with makes the repair decision easy.
Plastic End Tank Cracking
The factory radiator uses an aluminum core with plastic end tanks. Heat cycling makes the plastic brittle over time. The crack almost always starts at the upper hose fitting or the tank seam.
Once it starts, it only gets worse with every warm-up.
This is the reason most Outback radiators get replaced before the metal core ever fails. You'll spot it as a fine hairline crack with dried coolant residue around it.
Clogged Radiator Core
Old coolant breaks down and drops sediment that plugs the tiny tubes inside the core. The engine runs hot on the highway or while towing, but the gauge stays normal at idle. A flush sometimes helps, but a badly clogged core needs replacement.
Subaru's factory maintenance schedule calls for coolant replacement at regular intervals for exactly this reason. Skipping that service just accelerates the day you're standing over an open hood.
Electric Cooling Fan Failure
The Outback uses two electric fans, not a mechanical clutch fan. If the coolant temperature climbs only when you're sitting still, the fan is the likely culprit. The fan motor or its relay fails, and the air stops moving across the radiator at low speed.
This is a common issue that's often misread as a radiator failure. The fast fix guide for a radiator fan that won't start runs through the diagnostic tests in order.
The Radiator Cap Is Also a Suspect
A weak cap can't hold the system's 16 psi design pressure. Coolant then escapes as vapor instead of recirculating. You lose coolant slowly and find no puddle.
Replace the cap as part of any radiator service. The coolant specifications that matter here fall under the ASTM D3306 standard, and you should always verify you're using the right fluid for your model year.
The Outback Cooling System Decision Tree: Follow This Diagnostic Flow
Work through these branches in order. Each answer points you down the next path, so don't skip ahead.
Branch 1: Overheating in Stop-and-Go Traffic
If the gauge climbs when you're idling but settles down on the highway, check the two electric fans. Wait for the engine to reach operating temperature and watch for the fans to kick on. If they never cycle, the motor, relay, or coolant temperature sensor is at fault.
Per the factory service manual, the fans should switch on as the coolant passes roughly 200°F. If you need the full troubleshooting sequence, the explanation of how an electric radiator fan fails covers the relays, fuses, and connectors worth testing first.
Branch 2: Heavy Coolant Smell or Puddle
If you find green, blue, or pink fluid under the engine, move to a pressure test. Pressurize the cooling system to the cap's rated 16 psi and look for drips. If the pressure drops but no leak becomes visible, check the heater core inside the cabin.
Wet carpet on the passenger side or a sweet smell through the vents means the heater core is the culprit. That's a separate repair path.
Branch 3: Coolant Vanishes With No Puddle
If the level keeps dropping but the ground stays dry, combustion gas is likely pushing coolant into the overflow tank. Run a combustion leak test at the radiator neck. If the fluid turns yellow, the head gasket is compromised.
Stop here and continue down the head gasket repair path instead of buying a radiator. A radiator swap won't fix an internal engine leak.
Branch 4: Bubbles in the Overflow Tank
Bubbles right after shutdown are a warning sign. They mean compressed combustion gas is escaping into the cooling system. That's always serious and points to the head gasket, not the radiator.
The Flowchart in Practice
Below is the visual summary of this decision process. Follow the symptom, make the call, and confirm with the right test.
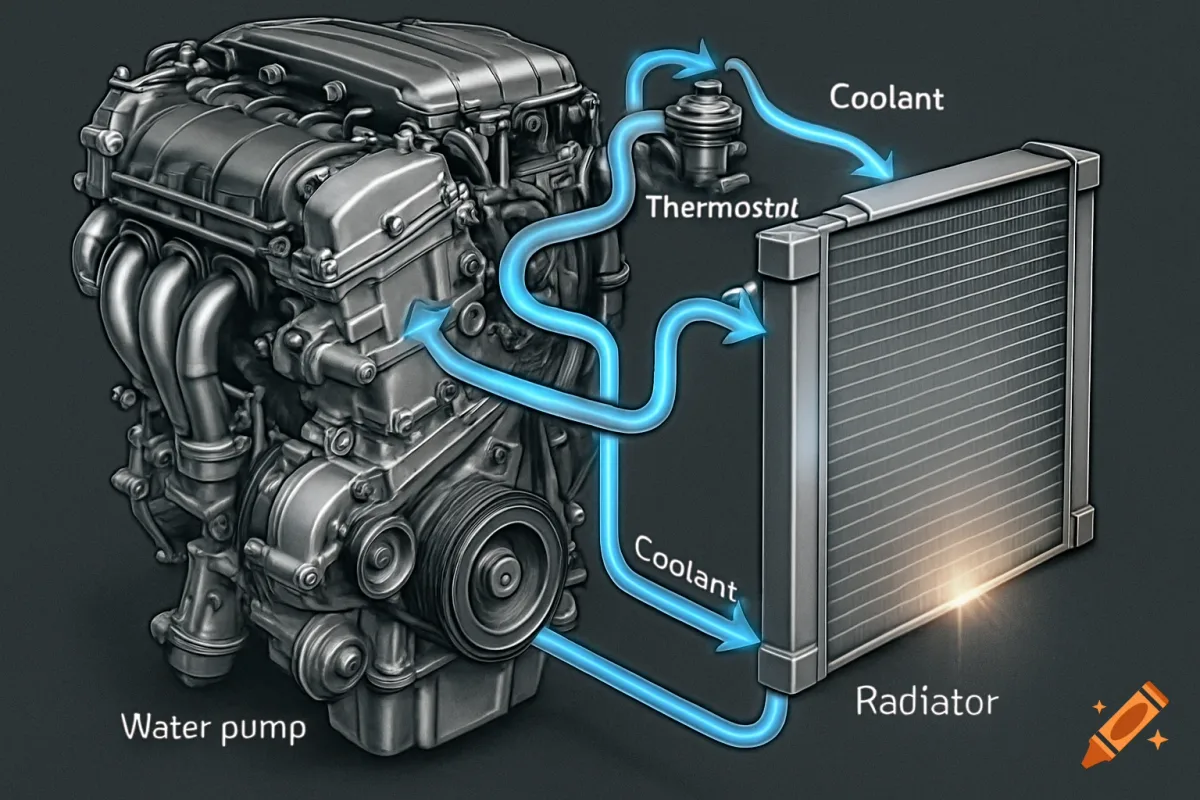
Image source: Bing (Web (fair-use with source credit))
One quick note: if the temperature gauge pegs into the red, stop driving immediately. Warped cylinder heads turn a $300 radiator job into a $3,000 engine rebuild. Park it, let it cool, and diagnose from there.
Radiator Replacement Step-by-Step: From Draining to Bleeding the System
Once you've confirmed the radiator is the problem, the replacement process is straightforward. Most owners finish in two to four hours on their first attempt.
What You'll Need
Basic hand tools, a drain pan, new coolant, a new radiator cap, and fresh upper and lower hoses. You'll also want a funnel and a pressure tester for the refill. The factory service manual calls for a 50/50 mix of Subaru coolant concentrate and distilled water.
Step 1: Drain the System
Let the engine cool completely. Hot coolant can burn you badly, so wait at least an hour. Remove the radiator cap, then open the drain plug at the bottom of the radiator.
The plug sits on the driver's side and the old coolant will pour straight into a drain pan. Dispose of the used coolant at a hazardous waste facility. Never pour it down a gutter or storm drain.
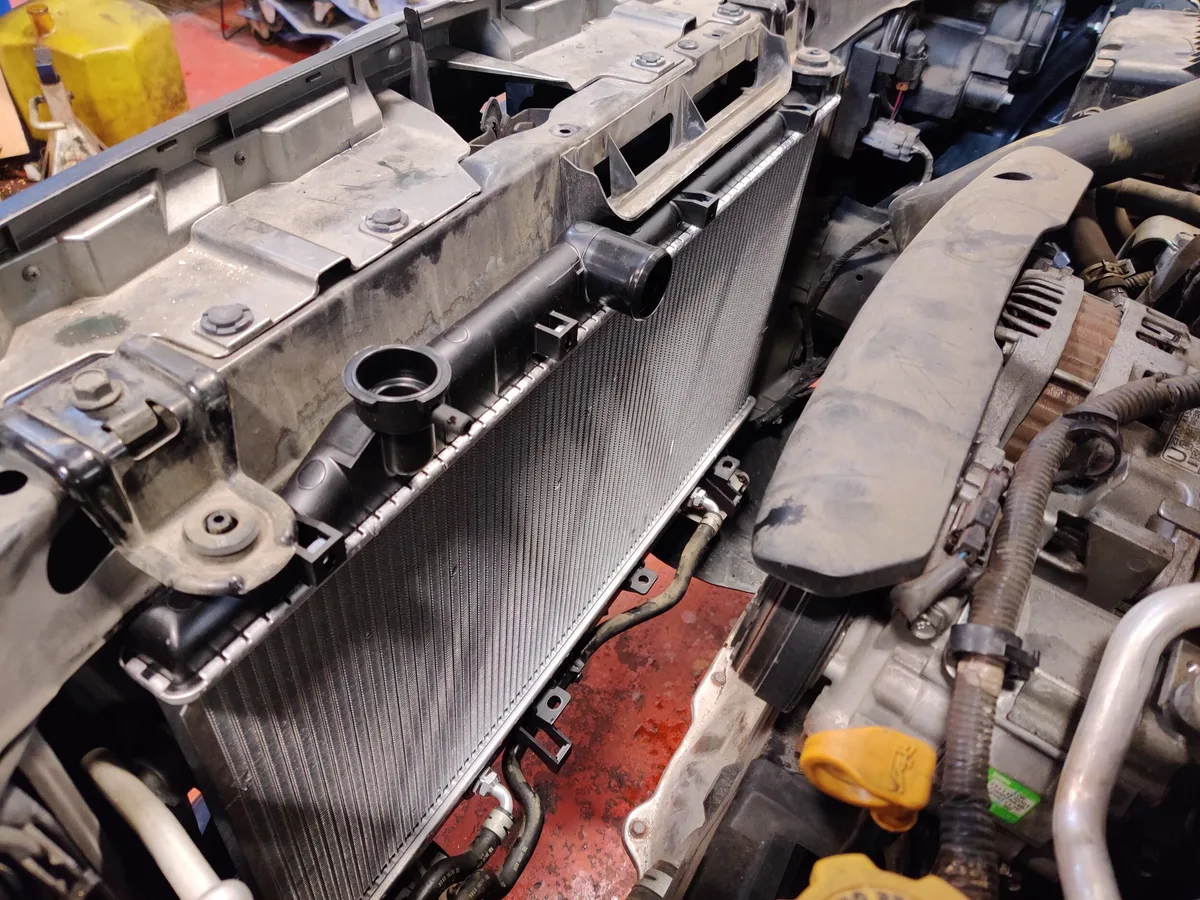
Image source: Bing (Web (fair-use with source credit))
Step 2: Remove the Fans and Shroud
Disconnect the two fan harnesses and unbolt the fan shroud assembly. On most Outbacks, the fans and shroud come out together as one piece. Set them aside so they don't block access to the radiator.
Step 3: Disconnect the Hoses and Cooler Lines
Loosen the lower and upper radiator hose clamps and pull the hoses free. Then disconnect the two transmission cooler lines on the passenger side. They carry transmission fluid through the radiator to control temperature.
Label them with tape so you can reconnect them in the correct order. Mixing them up won't stop the car from running, but it will make the transmission run hot and shift poorly.
Step 4: Lift the Radiator Out
Remove the two top mounting bolts and lift the radiator straight up. The rubber insulators underneath often stick to the old unit, so pull them off and swap them to the new radiator.
Step 5: Install and Refill
Set the new radiator in place, bolt down the top brackets, and reconnect the cooler lines and hoses. Fill the system with the 50/50 coolant mix you prepared earlier.
Step 6: Bleed the System
Air pockets are the biggest cause of post-install overheating. Run the engine with the radiator cap off and the heater set to full hot. When the thermostat opens, the coolant level drops and you can top it off.
If the heater blows cold after the job, you likely have an air pocket trapped in the heater core. That's the most common reason a car heater that blows cold shows up right after a cooling system service.
Outback Radiator Costs: DIY vs. Shop vs. Aftermarket Options
As of 2026, the Outback radiator market breaks down into three clear price tiers. Your choice comes down to budget, tools, and how long you plan to keep the car.
OEM-Style Plastic Tank Radiators
These match what the factory installed and start at about $100, going up to $250. They use the same plastic end tanks that crack over time. If you want the easiest bolt-in fit and you're okay doing the job again in roughly 100,000 miles, this is the option.
All-Aluminum Aftermarket Radiators
All-aluminum units cost between $200 and $400. They eliminate the plastic tank failure point entirely. Some owners report a slightly thicker core that requires a bit more care when refitting the fans and shroud.
For heavy towing, mountain driving, or owners who plan to keep the car for another decade, the all-aluminum route is the better long-term value.
Shop Labor and Full Installation
If you're paying a shop, expect to spend between $500 and $900 including parts and labor. The higher end of that range typically includes the 3.6L six-cylinder engine, where the radiator is pricier and the job takes longer.
Independent Subaru shops usually quote less than dealerships for this work. It pays to call two or three local shops for estimates.
| Option | Parts Cost | Labor | Best For |
|---|---|---|---|
| OEM-style plastic tank | $100 to $250 | DIY or shop | Factory replacement |
| All-aluminum aftermarket | $200 to $400 | DIY or shop | Long-term durability |
| Shop-installed radiator | $150 to $400 labor | 1 to 2 days | No DIY time |
Worth Doing While You're In There
Replace the thermostat, radiator cap, and both hoses while the radiator is out. Those parts cost about $50 total and prevent a second breakdown a year later. Doing them together also lets you do a full cooling system flush at the same time.
Mistakes That Turn a Radiator Swap Into a Headache
Skipping the Air Bleed
The most common mistake is skipping the burp step. Air pockets hide in the system and cause erratic temperature readings. The gauge reads fine at idle, then climbs once you drive.
Ten minutes of bleeding prevents that.
Reusing Old Spring Clamps
Factory spring clamps lose tension after years of heat cycles. Reusing them invites a slow weep at the hose fitting. Install fresh clamps while you're in there.
A few dollars in clamps beats a roadside tow.
Mixing Coolant Colors
Subaru's factory fill is blue, though some years use green. Mixing incompatible coolants can form a gel that plugs the heater core. Stick to the spec in your owner's manual.
Flush the system completely before switching colors.
Leaving the Rubber Mounts Behind
The old radiator's rubber insulators often stick to the cradle. Leave them behind and the new radiator sits crooked, stressing the hoses. It can rub through the core over time.
Transfer them to the replacement unit.
Overtightening the Drain Plug
The drain plug is plastic. Cranking it down strips the threads or cracks the petcock seat. Snug it by hand until it seals, then stop.
A replacement drain cock is hard to find locally.
Flipping the Transmission Cooler Lines
The two cooler lines must return to their original positions. Cross them and the transmission runs hot, which causes poor shifting. Label each line with tape before disconnecting it.
That simple step saves a confusing second job.
FAQs: Coolant Type, Burping the System, and Transmission Cooler Lines
What coolant does a Subaru Outback take?
Subaru specifies its own Super Coolant in a blue formula. Some model years use a green equivalent. Check the owner's manual and use the correct OEM spec.
Don't mix colors. If you're unsure what's in there now, do a full flush first.
How do I burp the cooling system?
Follow the bleed steps in the replacement guide. Run the engine with the radiator cap off and the heater on full hot. Squeeze the upper hose a few times to push trapped air out.
Top off the radiator, replace the cap, and recheck after a short drive.
Do I have to disconnect the transmission cooler lines?
Yes. The transmission cooler lines run through the radiator on most Outbacks. Drain them into a clean container so you can reuse the fluid.
Label them before removal so they go back in the same spots. Crossed lines cause poor shifting and high transmission temperatures.
How long does a radiator replacement take?
A first-timer at home usually finishes in two to four hours. The work includes draining, removing the fans, swapping the radiator, and bleeding the system. A shop typically completes it in half a day.
Budget an extra hour if you're also replacing the thermostat and hoses.
Can a stop-leak product fix a cracked radiator?
Not reliably. Plastic tank cracks expand and contract with every heat cycle, so stop-leak rarely seals them for long. Worse, the product can clog the heater core and transmission cooler.
A proper replacement is the only lasting fix. Dispose of old coolant per EPA guidelines.