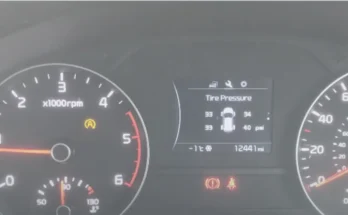
Your Tesla Model 3 tire keeps losing air, and you're staring at the TPMS warning wondering what to do next. That amber light on the dash doesn't tell you whether it's a nail, a bad valve stem, or just cold weather playing tricks.
The good news is that most causes are simple to diagnose at home. Tesla recommends a cold tire pressure of 42 PSI across all four wheels, and the tire pressure monitoring system typically alerts you when pressure drops about 25% below that threshold. Let's walk through the process step by step so you can find the culprit and decide whether to repair, replace, or call for help.

49% off Today's Exclusive Deals
Limited-time Exclusive Deals. Check current discount on Amazon.
Check Price on Amazon As an Amazon Associate I earn from qualifying purchases.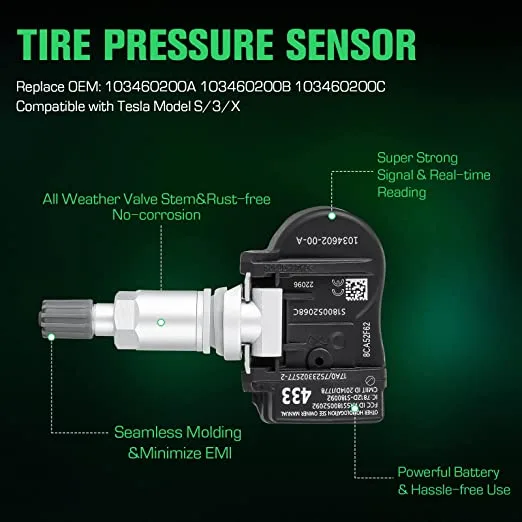
Image source: Bing (Web (fair-use with source credit))
Quick Answer
Your Tesla Model 3 tire keeps losing air due to a puncture, valve leak, bead leak, or temperature drop. Start with a digital gauge check. Then inspect the tread for nails.
49% off Today's Exclusive Deals
Limited-time Exclusive Deals. Check current discount on Amazon.
Check Price on Amazon As an Amazon Associate I earn from qualifying purchases.Spray soapy water on the valve stem. If pressure drops slowly in cold weather, that's normal.
Step 1: Check the Warning and Confirm the Leak
The TPMS warning is your first clue, but it's not the full story. Many Model 3 owners panic over a light that simply means the tire needs 3 PSI. So grab a decent digital tire gauge and confirm the actual pressure before doing anything drastic.
Cold tires give the most accurate reading. That means the car has been parked for at least three hours. Compare what you see against the 42 PSI spec on the driver's door jamb sticker.
If you're below that when cold, the tire is genuinely low.
49% off Today's Exclusive Deals
Limited-time Exclusive Deals. Check current discount on Amazon.
Check Price on Amazon As an Amazon Associate I earn from qualifying purchases.A slow leak of 1 to 2 PSI per month is normal permeation. Physics, not damage. But losing 3 to 5 PSI in a single week means there's a real leak worth hunting down.
The same way you'd look into a small coolant leak before it becomes a breakdown, track down the tire issue early.
Step 2: Find the Leak Before You Do Anything Else
Refilling the tire and hoping for the best is tempting. It also guarantees the warning will return in a few days. A few minutes of inspection will save you time and money.
Start by listening for a hiss around the wheel. No luck? Mix water with a drop of dish soap in a spray bottle.
Spray the valve stem, the tread, the sidewall, and the rim edge. Wherever bubbles form, that's your leak point.
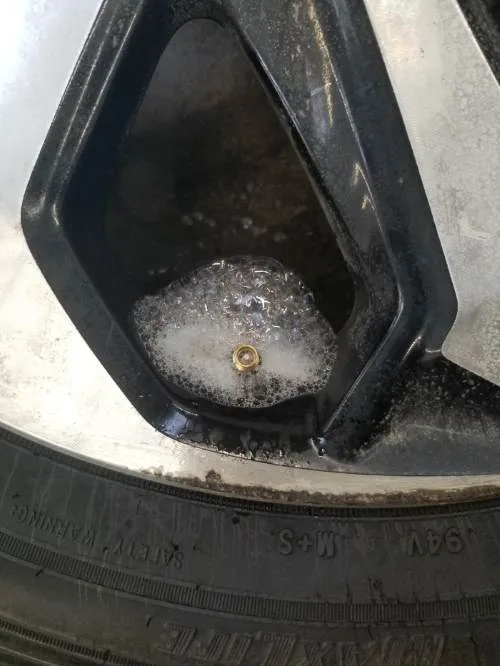
Image source: Bing (Web (fair-use with source credit))
| Inspection Point | What You're Looking For | Likely Cause |
|---|---|---|
| Valve stem | Bubbles or hissing | Loose valve core, cracked stem |
| Tread area | Nail, screw, or visible hole | Puncture from road debris |
| Sidewall | Cut, bulge, or bubble | Impact damage from potholes |
| Rim edge | Bubbles where rubber meets metal | Corrosion, dirt, or bent wheel |
Can't find anything? Check the valve core. It's a tiny part inside the valve stem, and it's a common cause of slow leaks.
A replacement core costs about $2 and takes seconds to swap with a valve core tool.
Step 3: Match Your Leak Pattern to the Most Likely Cause
The way your tire loses air points directly at the culprit. Use these patterns as your decision tree.
Sudden flat after driving. That's usually a puncture or impact damage. You hit something, or a nail went clean through the tread. If the sidewall shows a cut or bulge, do not drive on it.
Replace the tire immediately.
Slow leak over several days. A tire losing 3 to 5 PSI over a few days typically means a nail in the tread, a bad valve core, or corrosion between the tire bead and the rim. Small damage, slow leak, but still worth fixing before it becomes a larger issue.
Pressure drops only in cold weather. Cold air contracts. Pressure drops about 1 PSI for every 10°F temperature drop. Top up to 42 PSI and monitor.
It's almost always harmless and seasonal.
Refilling every single day. That's not a slow leak anymore, that's an active problem. Expect a deep nail, a cracked wheel, or a damaged bead. Driving on a tire that needs daily refills risks a blowout.
Get it checked now.
| Leak Pattern | Most Likely Cause | Severity |
|---|---|---|
| Sudden flat | Puncture or sidewall impact | High |
| 3–5 PSI loss over days | Slow puncture, valve leak, bead leak | Medium |
| Drops with cold weather | Normal temperature contraction | Low |
| Needs refill daily | Significant damage or cracked rim | Critical |
Ignoring a serious leak is like ignoring a squeaking brake that gets louder. It won't get better on its own.
Step 4: Decide Between Repair, Sealant, or Replacement
Once you've found the leak, you have three paths forward. The right one depends entirely on where the damage is and how big it is.
Patch repair. A puncture in the tread area that's smaller than 1/4-inch in diameter is repairable. The proper fix is a patch from the inside. The shop removes the tire, preps the interior, and installs a combination plug-patch.
Expect to pay $30 to $60 and wait 30 minutes. This is the safe, permanent solution.
Tire replacement. Sidewall punctures, bulges, cuts, and holes larger than 1/4-inch require replacement. A patched sidewall fails catastrophically at speed. Per NHTSA tire safety guidelines, any damage to the sidewall or shoulder is non-repairable.
Don't push it.
Sealant emergency fix. The factory sealant kit can temporarily plug small punctures and get you to a shop. But it makes a mess, and it often ruins the TPMS sensor. That adds $100 to the repair bill.
Only use it when you can't safely reach a shop without losing all your air.

Image source: Web (Bing) / linkedin.com (Web image (fair-use with source credit))
| Option | Best For | Cost | Time |
|---|---|---|---|
| Patch repair | Tread punctures under 1/4-inch | $30–$60 | 30 min |
| Sealant kit | Emergency temporary fix | Included with car | 5 min |
| Replacement | Sidewall damage, large holes, worn tread | $200–$500 | 1–2 hours |
| Tesla mobile service | Convenience, warranty-friendly | $150–$400 | Same day or next day |
Step 5: Cost and Logistics of Fixing It
A local tire shop handles Model 3 tire repairs every day. Patch repairs run $30 to $60, and most shops complete them within an hour. That's your cheapest and fastest option for a simple puncture.
Tesla mobile service costs more, usually $150 to $400 after the trip fee, but they come to you. The response time varies by region. Urban areas often get same-day service, while rural zones can wait two or three days.
Replacement tires for the Model 3 cost $200 to $400 for 18-inch setups. Twenty-inch performance wheels push closer to $500. Check the tread depth before agreeing to a replacement.
If a penny shows Lincoln's full head, you're at 2/32 inch or below. That tire is legally worn out.
One more thing. Tesla roadside assistance is free during the Basic Vehicle Limited Warranty, which covers four years or 50,000 miles. They'll inflate, repair, or tow your car depending on the damage.
After the warranty expires, expect per-visit fees.
| Service | Typical Cost | Best When |
|---|---|---|
| Independent shop patch | $30–$60 | Simple tread puncture |
| Tesla mobile service | $150–$400 | You need doorstep convenience |
| Replacement tire | $200–$500 | Sidewall damage or worn tread |
| Roadside tow to Tesla | $0 during warranty | Complete flats, no spare available |
Mistakes to Avoid When Your Model 3 Tire Keeps Losing Air
A few common mistakes turn small leaks into expensive replacements. Here's what to avoid.
Driving on a visibly soft tire. Even a short roll on a nearly flat tire crushes the sidewall beyond repair. Air it up first. Inspect the damage.
Then decide whether it's safe to drive. It's exactly how you'd handle a brake system failure. Stop, assess, correct.
Reaching for the sealant too quickly. The factory sealant is an emergency tool, not a convenience. It kills TPMS sensors and costs you extra money. If you have a compressor and the leak is slow, inflate and drive to a shop.
Save the sealant for situations where you'd otherwise be stranded.
Repairing what shouldn't be repaired. Sidewall tears, holes larger than 1/4-inch, and tires that were driven flat don't get patched. They get replaced. This is like the grinding sound of a brake that needs immediate attention versus a squeak you can tolerate.
Know the difference.
Forgetting about the foam liner. Many Model 3 tires have acoustic foam glued inside. Standard plug kits can't penetrate it properly. When a shop says the tire is unrepairable, ask if they're experienced with foam-lined EV tires before accepting their verdict.
Frequently Asked Questions
Why does my Model 3 TPMS go off when the weather gets cold?
Cold air contracts and pressure drops about 1 PSI per 10°F. A temperature swing from 60°F to 30°F can trigger the warning. Top up to 42 PSI and the light will clear.
It's temperature, not damage.
Is a plugged tire safe on a Tesla?
A professional patch repair is safe. A DIY plug is not a permanent fix, especially on foam-lined Tesla tires. Patch repairs restore structural integrity and are accepted under industry tire repair standards.
How much pressure loss overnight is normal?
Normal permeation is 1 to 2 PSI per month, not per night. Losing 1 PSI overnight means there's a small leak. It's worth locating even if the TPMS hasn't triggered yet.
Can Tesla roadside assistance fix a flat tire?
Yes. During the Basic Vehicle Limited Warranty, Tesla roadside offers mobile tire service and inflation. They'll repair a simple puncture on site.
For major damage, they arrange a tow to the nearest Service Center.
Final Decision Guide: What Should You Do Right Now?
Here's your quick path based on what you've found. Use the table to match your leak to the right move.
| Your Situation | Action | Cost |
|---|---|---|
| TPMS light on, tire near 38–40 PSI | Top up to 42 PSI, recheck tomorrow | $0 |
| Soap bubbles at the valve stem | Replace the valve core | $2–$5 |
| Nail in the tread, hole under 1/4-inch | Patch repair at a tire shop | $30–$60 |
| Sidewall bulge, cut, or bubble | Replace the tire immediately | $200–$500 |
| Daily pressure loss, no visible leak | Have a shop dunk-test the wheel | $10–$20 |
| Wheel damage after a pothole | Replace tire and inspect the wheel | $250–$550 |
Don't guess and don't procrastinate. Use the soapy-water test, match the leak pattern to the cause, and pick the fix that matches the damage. A few minutes of checking now saves you a tow truck and a blowout later.
If other problems keep stacking up, consider that a stuck gear selector is never a good sign either. Take care of the car, and it'll take care of you.